Wednesday, 29 December 2010

Canadian bakin'


A few recent developments led me to make today's baked good. The most notable influence was the presence of ground flaxseeds in my house. As you may recall, I purchased these for use in vegan chocolate chip cookies. In anticipation of preparing further vegan or otherwise weird baked goods, I had also obtained ingredients like coconut oil and agave.


Despite my residual lack of enthusiasm about cookies (or anything) that do not contain butter, eggs and sugar, today I felt inspired by all these new members of my baking cabinet. I spent a few hours (just kidding...) researching vegan recipes, as I figured these were more likely to call for "healthy" things like agave and flax. Unfortunately, most of the recipes I perused required even more ingredients new to my bake-cabulary (xantham gum? really?). Feeling unready to branch quite this far out, I decided to try my luck with flaxseed. A google search of "flaxseed baking" lead me to none other than flaxmatters.com (yes.). Fascinated, I clicked on a few recipes on the site. Overall underwhelmed, I found that one recipe stood out; it was for Farmland Flax Cookies (yes.). The recipe made 108 cookies, and the proportions were not easily halved (3 eggs, 1 1/3 cups of butter, etc.). I entertained the idea of dividing the recipe into 1/3, when a final desperate search led me to this magical online haven: www.canadianliving.com


This site provided me with the same recipe, but 1/3 the size of the original, and without a freezing-the-dough-and-waiting component (one which tends to put me off a recipe). Anyway, I adjusted slightly, adding some whole wheat flour (if you're making a "healthy" cookie, you might as well go all out), and, in the final batch, throwing in some chopped chocolate covered cherries (ha, you thought I was serious about being healthy). Lastly, I'm pretty sure the original recipe wanted whole flaxseeds. Since all I had was ground ones and my disdain for actually following recipes as written (never failed me yet!) is substantial, I didn't stress about this detail.


Far from the Farmland Flax Cookies, eh?


* 1/2 cup brown sugar

* 1/2 cup butter, room temp

* 1/3 cup granulated sugar

* 1 egg

* 1/2 tsp vanilla

* 1/2 cup all purpose flour

* 1/2 cup whole wheat flour

* 3/4 cup quick cooking rolled oats

* 2/3 cup ground flaxseeds

* 1 tsp baking soda

*optional: 1/2 cup chopped chocolate covered dried fruit, or chocolate chips, or anything delicious


Preheat oven to 350˚.


Cream butter and sugar. Add egg and vanilla (feel free to pour) and mix well. Pour the flours, flaxseed, oats and baking soda on top and combine well. If adding any additional ingredients do so now.


For the first round of baking, I used two cookie sheets, and placed each on a separate rack. Usually this works ok, even without switching the sheets halfway through. The baking is slightly uneven, but for the most part I have not found this method to be catastrophic. This time, though, I observed what the original recipe recommended and switched the two sheets after 6 minutes. As it were, this might have been a minute too late. Although the cookies took about 11 minutes total to bake, the batch that started out on the bottom rack ended up mildly burned underneath. Nothing severe, but if there is one thing I pride myself on, it is my compulsive underbaking, which generally helps me avoid burning (pineapple upside down cake aside...). The moral is: probably just do one batch at a time, or make sure the lower rack is as high as possible in the oven, and that you switch the baking sheets early enough. For the record, the other sheet that went in at the same time came out perfectly.


Ending note for Dani: I was not planning on sampling these cookies until after supper. Upon seeing them piled on a plate, though, golden brown and glimmering with butter, I could not resist. I tried half of a cherry-filled one, and promptly polished off the other half without any further adieu. In other words, these cookies are stellar. Maybe farms in Canada DO have something to offer the world...

Sunday, 26 December 2010

Here I bake again on my own

Dani has abandoned me. First she left San Francisco, and now she has fled the country. In order to drown my sorrows, I am making cookies.

Nic, another baking enthusiast, recently requested that I feature more vegan treats on this old thing. Always wanting to please the fans, I was only too happy to oblige. Vegan baking is an art in which I have dabbled once or twice. However, vegan items usually require various obscure ingredients that require extra work to obtain and/or use. When it comes to baking (and everything), extra work goes against all that I believe in. Furthermore, at the end of the day, non-vegan baked goods are overall pretty stellar, and why mess with a good thing?

Nonetheless, Nic had sent me a vegan oatmeal chocolate chip cookie recipe that contained almost entirely normal baking ingredients. I was going to have to venture forth into the unknown realm of ground flax seeds, but I was prepared to do this in order to bring Nic's dream to fruition.

I followed Nic's recommendation of using chocolate chips instead of raisins (I mean, duh). In the interest of going hard rather than going home, I also purchased vegan chocolate chips, but unless you or anyone devouring the cookies is a real vegan, any chocolate chips are fine I'm sure.

Dani is in Sweden cookies
(recipe courtesy of Nicsicles, via the internets)

* 1 teaspoon ground chia seeds or 2 tsp. egg replacer powder or 2 tsp. ground flaxseed (being unfamiliar with all these things, I went with the first thing I found in the store, which was the flaxseed)
* 2 tablespoons water
* 1 cup regular oats
* 1 cup white whole wheat flour
* 1/2 teaspoon baking soda
* 1/2 teaspoon baking powder
* 1/2 teaspoon salt
* 1 teaspoon cinnamon
* 1 cup chocolate chips
* 1 teaspoon vanilla
* 1/2 cup maple syrup
* 1 banana, not too big
* 1/2 teaspoon lemon juice

Preheat oven to 375˚.

Mix the flaxseed with the water in a small-ish mixing bowl and set aside. In a medium mixing bowl, combine the flour, oats, baking soda and powder, salt and cinnamon.

Note: Being the genius that I am, I did not read the whole recipe carefully before starting. The bowl I used for the flaxseed and water was far too small for the next instructions so I tweaked them slightly.


Add the maple syrup, vanilla (which was closer to 1 tsp due to my heavy hand and adoration of vanilla) and lemon juice to the flaxseed mixture and mix. Add to the dry ingredients but don't mix yet. In the same small bowl, mash the banana with a fork. Be sure to mash very well in order to avoid banana clumps, because once the banana is added to the mix it is hard to crush it further. Add the liquefied banana to the other ingredients and mix it all up. Lastly, add the chocolate chips and combine.


The original recipe said to line baking sheets with parchment paper, an advice I ignore without fail in almost all recipes. However, after the first batch stuck pretty nicely to the baking sheet, I caved and used some (vegan) cooking spray. This was effective.


Anyway, place the cookies on a GREASED cookie sheet. They don't spread out when they bake, so it is good to flatten them a little before putting them in the oven. Bake for about 9 minutes. Put them on a plate, and share with your non-animal-product-consuming friends.

Friday, 17 December 2010

blackstrap

This time, it was all Nic's fault. Yes, maybe it was I who proposed baking as a means for passing the droll hours of the evening, but it was Nic who demanded ginger cookies.

Something everyone should know about me: I love ginger cookies. Shocking, you may think (sarcastically), considering I love almost all cookies and food containing high proportions of sugar. But ginger cookies hold a special place in my heart. When I was little, my favorite treat was a giant, sugar coated ginger cookie and steamed milk (nostalgia!).

My first experience of baking ginger cookies, however, caused me to reassess my adoration. I can't recall where I obtained the recipe, or what the occasion was for the biscuits, but I vividly remember feeling overcome with the taste of molasses in every bite. Now, I appreciate that molasses is essential to most ginger cookies, but I would rather not be reminded of this when I eat the final result.

The cookie recipe Nic forced upon us all fully redeemed ginger cookies in my mind and taste buds. Also, shout out to Emma for reading me the instructions and ingredient amounts. Luv u. Here's how it went:

Ginger Redemption Song
(adapted from the Cookie and Biscuit Bible by C. Atkinson)

* 2 1/2 cups flour
* 1 tsp baking soda
* 1/2 tsp ground ginger
* 1/4 tsp ground cinnamon
* 1/4 tsp ground cloves
* 1 stick butterrr (I think we used salted)
* 1 1/4 cups sugar
* 1 egg
* 4 tbsp molasses (don't be afraid! It's not that much)
* 1 tsp lemon juice
* optional: we added about 1/3 cups tiny candied ginger pieces. Big plus.

Preheat oven to 325˚. Cream butter and sugar. Add egg and mix well. Mix in lemon juice and molasses.

Separately combine flour, bicarb and spices. SLOWLY add this mixture in batches. Let someone like Dani who likes mixing things that resist being mixed do this part. If you are adding ginger pieces, do this now.


The original recipe calls for rolling the dough into balls, then rolling these in more sugar. I "forgot" to do this, and was far from displeased with my oversight.

Note: the candied ginger made it a little harder for the balls of dough to stick together, but just make sure the pieces are very small and it should be fine.


Bake for 12-15 minutes. Eat for breakfast, lunch, and/or dinner.

Tuesday, 14 December 2010

Bake-off X

I wish I could tell you all that yesterday's bake-off at work was reminiscent of my first bake-off back in September. Bake-off is a tradition at my place of employment; winners not only get the glory of victory, they also get the privilege of wearing the bake-off tiara. With the upcoming division holiday party this Wednesday, the pressure of winning and getting to wear the tiara to the event was suffocating.

At the previous bake-off, I creamed the competition with an epic-ly delicious coffee cake (seriously, I had a record victory in bake-off history). Being that my grandmother was born in Scotland, I felt reasonably confident about the chosen baked good: shortbread. My good-natured competitor had informed me that she was going to produce a variation on plain shortbread and even sent me an article with possible additional ingredients to include. But my mind had already been made up. I would recreate lavender shortbread I had made once before to infinite praise (mostly from my mother).

Unfortunately, the morning of bake-off presented some obstacles. First, I had failed to obtain unsalted butter the day before. I usually am not picky about the butter I use (who doesn't love salt), but when it comes to something as consequential as bake-off, I don't mess around. Well, here was my first error. I scrounged up one stick of unsalted butter, and settled for a second stick of salted. Next, I popped into the backyard to pick some lavender, only to find that all the lavender was gray, shriveled, and scentless. My first instinct was to eliminate the lavender entirely. Upon reevaluation, though, I realized that the cookies would look awfully plain without anything making them stand out. Presentation is 25-90% of the battle in bake-off. So I rounded up some reasonably presentable flowers and proceeded to shortbreading.

Fickle Lavender Shortbread

* 2 cups flour
* 1/2 cup corn starch
* 1 cup butter (unsalted is probably the way to go)
* 2/3 cup sugar
* pinch salt
* 16 pieces of lavender for the top

Mix flour, salt, cornstarch and sugar in a bowl. Cut butter into cubes then crumble into the mixture (you can use a pastry cutter or knives if you are fancy and apparently if you are serious about winning bake-off).

Put half the dough into a round cake tin (8-9 inches, I believe), and the other half in another tin of the same size. Cut each batch into 8 triangles (this part was slightly tricky, as my dough was not well mixed enough at this point and the top was too floury for good slicing. This did not prove too problematic (or so I thought), as they are easy enough to cut once finished baking). Press a pieces of lavender into each wedge. Place in refrigerator while the oven preheats to 325˚. Bake for 40-45 minutes, or until slightly browned on top. Once finished baking, cut the cookies into triangles again, and allow them to cool.

At this point in the process, the shortbread were still looking like winners to me. The lavender added a little something special and made them less bland than plain shortbread, and the buttery-sugary smell the overpowered my kitchen promised me world domination.

I allowed them to cool for a few hours, making sure to taste one before proceeding to work. They were on the soft side for shortbread, but otherwise buttery and just sweet enough.


When the judging began, though, my confidence plunged. Although everyone kept repeating that both were delicious, no one could figure out what the thing in the middle was. One lab member added that it looked like a crushed grasshopper. Yum.

Anyway, at the end of it all, each person ranked each shortbread out of 10 points. The final scores were 48 (me) and 49 (the other one). Based on the commentary, I was happy to have lost by such a small margin. Still, in bake-off, as in life, losing is losing. Nonetheless, I highly recommend these cookies for guests or presents or yourself or your mom, just maybe not for bake-off.

Friday, 10 December 2010

Bacon

Yesterday I decided to compensate for eleven years of not eating meat by consuming vast amounts of bacon (including a bacon wrapped Mission dog at midnight). Because I had a final earlier in the day and spent the morning wracked with nerves, bacon ended up being pretty much all I ate yesterday. That is, with the exception of cookies. My dear friend Emma decided to host a potluck last night, and, always eager to share my baking skills with the world (it's sarcastic. See previous post), I decided to bring cookies.

Unfortunately, I decided this while at Dani's house at 6 PM, half an hour before we were expected at Emma's. When I voiced my cookie plan to Dani, she warned me that her house was lacking exciting baking ingredients. She had no chocolate chips, no peanut butter, and no cinnamon. She did, however, present the brilliant idea of including sipping cocoa in the mix. From there, it was on.

By raking through Dani's cupboards, I was able to produce the following creations, which, based on the rate at which they were consumed at Emma's house, were far from disgusting.

Cupboard cookies
* 1 stick butter
* 1 cup + 2 tbs flour
* 1 1/2 tsp baking soda
* 1 cup sugar
* 1/2 cup sipping choc
* 3/4 cup oats
* 1 tsp vanilla
* 1/3 cups nutella
* 1 egg

Cream butter and sugar. Some brown sugar would probably work, but I find that granulated sugar holds its own nicely in chocolate cookies. Once creamed, add the egg and vanilla. Next, add chocolate, baking soda and flour. Add the oats and nutella. The amounts I used above were restricted by the amount of oats and nutella that Dani had, but both could be increased slightly with no negative consequences.

Combine all ingredients very well, the refrigerate for 20-30 minutes (this is optional, but makes the dough easier to work with). Shape into tiny balls on a baking sheet, and bake at 350˚ for 9-12 minutes. Also, probably double the recipe if you want any left over.

Wednesday, 8 December 2010

Burning down the house


When I tried to include a music recommendation in a previous post, I was unceremoniously shot down by my sidekick/life coach, Dani. She commanded that I remove the line about how Aston Martin Music by Rick Ross feat. Drake and Chrisette Michele is the best song ever of the moment, insisting my suggestion sounded stupid.

Well, like it or not, my most recent baking adventure warrants two songs. Here they are:
1. For those who share my sophisticated appreciation of rap, listen to Fireman by Lil Wayne
2. For those who might not be gangster enough for Weezy, but still like good music, Incinerate by Sonic Youth is an adequate accompaniment to Smoked Pineapple Upside-down Cake.

Get it?

It all began last spring when I made mind-blowing pineapple upside down cake (pictured above). Ever since then, Dani has been begging me to recreate it. On Monday, after a day of traipsing around the city climbing hills and trees, we decided that the time had come. We consulted a few recipes, and decided to do a bit of improvisation.

Smoked Pineapple Upside-down Cake
* 1 can pineapple slices
* 1 cup brown sugar
* 4 tbsp melted butter
* 1/2 cup butter, room temp
* 1 cup granulated sugar
* 1 tsp baking powder
* 1 tsp baking soda
* 2 cups flour
* 2 eggs
* 1 cup buttermilk
* 1 1/2 tsp vanilla
* 1 tbsp dark rum

Preheat oven to 350 ˚F.

Spread the brown sugar evenly on the bottom of a baking pan. Use any pan EXCEPT A SPRINGFORM PAN. DO NOT USE A SPRINGFORM PAN. Pour the 4 tbsp melted butter over the sugar. Arrange the pineapple over the sugar/butter.


Cream remaining butter and sugar. Mix very well. Add the eggs and mix again. Mix the flour, b.p and b.s. together (I used the liquid cup measure). Alternate adding the dry mixture and the buttermilk (which I made using milk and a splash of vinegar). Finally, add the vanilla and rum. Don't let Dani watch this part, for she is not a pirate.

Mix to combine, but do not overmix. Pour the batter over the pineapple and bake for... well that is where the fun began.

After about 10 minutes of baking, we began to notice powerfully delicious smells, even though we were far from the kitchen. We decided that this was a good thing. A few minutes later, though, this deliciousness was replaced by a burning scent. We hurried into the kitchen and opened to oven to a billow of smoke surrounding a raw cake. The sugar/butter lining the bottom of the pan had seeped out and dripped onto the oven floor, and was rapidly morphing into a solid black substance. After cursing my stupidity for a few minutes, I decided to shut the whole thing down and toss the cake-fetus in the garbage. Dani intervened, though, and persuaded me not to lose hope. I resolved to simply turn off the oven and leave the door closed, allowing the cake to continue slow-baking as long as the heat lasted. I did not feel too optimistic, but the alternatives simply would not do.

The next morning, I checked on the cake, which had spent the night in the oven. The middle was sunken and pretty wet, but the majority of the cake had persevered and even looked appetizing. Upon tasting later that day, a few conclusions were reached:
1. Pineapple upside down cake might be the best cake ever
2. The topping needed a little more butter for the amount of brown sugar we used, and the two should probably have been melted together before put in the pan. Some shortcuts just don't cut it.
3. Never ever use a springform pan when making a pineapple upside down cake, or any such cake, and if you insist on doing so anyway, put the pan on a baking sheet. (Then again, if you like your cake half raw and with a faint smoky aftertaste, by all means use the springform pan. I won't judge you).

Tuesday, 7 December 2010

Spice up someone else's life!


There is nothing quite like an array of spices coated in butter and sugar and baked. That is the more or less of the spice cookies I made last week for my father's co-workers. Early in the week, he informed me that I was going to bake for the people who share his office (no, he did not ask, he informed). Fortunately, I am the best daughter in the world with an abundance of biscuit recipes to go around.

Earlier this year I made Spicy Pepper Cookies from the oh so amazing Cookie and Biscuit Bible for some family friends of friends of mine. The cookies were the life of the party. Needless to say, I knew exactly what to make for these other people I barely know.

Spice-cookies-for-people-I-barely-know
(adapted from the Cookie and Biscuit Bible by Catherine Atkinson)

* 1 3/4 cups plain flour
* 1/2 cup cornstarch
* 2 tsp baking powder
* 1/2 tsp ground cardamom
* 1/2 tsp cinnamon
* 1/2-1 tsp nutmeg
* 1/2 tsp ginger
* pinch salt
* 1/2 tsp ground black pepper
* 1 cup butter, softened
* 1/2 cup brown sugar
* 1/2-1 tsp vanilla
* 1 tsp finely grated lemon zessst
* 1/4 cup heavy whipping cream or milk if that is all you have (and really, who has heavy whipping cream just sitting in their fridge. Don't you know there is an obesity epidemic going around?)
* 3/4 cup ground almonds

First, prepare everything. This step will vary for every person. The first time I made these, preparations involved: chopping the almonds; peeling lemon rind with a peeler and then chopping the peel (we have a zester. I do not recall why I had to do it this way. But just know it can be done for those without parents with fancy kitchen utensils); our pepper grinder does not really work at all, so I used our bite-size mortar and pestle to grind the peppercorns, along with the cardamom pods. I realize that this might not sound like a great deal of work, but for someone who typically practices the "just throw it in the bowl" baking method, it was a new level of labor intensive.

Anyway, this round was slightly different. I had pre-ground almonds (easy to find at the store, keep in the fridge), and I managed to locate the lemon zester, saving myself some serious near-losses of fingers. I still had to attack the pepper and cardamom with the teensy-weensy pestle, but who doesn't like to pretend we live in a pre-pre-prepared world?


Once everything is prepped, begin the real baking.

Preheat oven to 350˚ F.

Cream butter and sugar. In round 1, I used beaters, but a wooden spoon suffices sufficiently. Add the vanilla and lemon rind. Use a two cup liquid measuring cup to combine the dry ingredients (or a separate bowl if you swing that way). Alternate adding this mixture with the milk/cream. A wise person (I think it was Paula Deen) once told me to always end with the dry component when adding alternately with liquid, but eh, these are cookies, not soufflé.

Once all the above is added and mixed, throw in the almonds and beat it up.

Form tiny balls and place on a cookie sheet. The Bible recommends baking for 15-20 minutes, but I would err on the side of 10-15 minutes, unless you like your cookies Mojave desert style (I exaggerate, but trust me, slightly under baked=win).


Cool on a rack if your mom is watching, or transfer right to a plate. They are still good the next day. And the next. And they will make you really popular with people you barely know.

Monday, 6 December 2010

Smoke lung.

Coming soon: How not to make a pineapple upside down cake.

Saturday, 27 November 2010

Rolling


For the past 8 months or so I have been holding my cousin's Bread Bible by Rose Levy Beranbaum hostage. I had used it a few times, but was still overall intimidated by the excessive length and detail of all the recipes. Nonetheless, when my cousin requested that I bring dinner rolls to Thanksgiving, I resolved to rise to the challenge (an unintentional but brilliant pun!)

For the week before T-day I fretted on and off about my upcoming task. I planned to do a test run; I contemplated starting the night before to allow sufficient time for the dough sponge (a new concept for me) to do whatever it is that it does for 1-24 hours. Neither of these ideas came to fruition.

Instead, I awoke painfully early on Thursday morning and got to work. Here is a summary of how it went:

8:30 AM
I mixed together
* 1/4 tsp yeast
* 1 1/2 cups/170 g flour
* 3/4 cup + 2 tbsp warmish water
* 1 tbsp + 1/2 tsp honey

This was the sponge that was meant to sit for 1-24 hours.

I waited about 2 hours. Next, mix:
* 1 1/3 cup/156 g flour (reserve 1/4 cup)
* 1/2 tsp yeast
* 20 g dry milk
Sprinkle the mixture over the sponge (when I say sprinkle I mean dump unceremoniously) and leave to sit for 1-3 hours. It was around this time that I realized I was only making enough dough for 12 rolls, and I was asked to make 24. After kicking myself repeatedly and crying it out, I began on a second batch which followed about 1 hour behind batch #1.

After the 2 hours or so of sitting, add:
* 4 1/2 tbsp butter, softened
* 1 1/2 tsp salt

and mix the whole thing into a dough.


Knead the dough for a few minutes, then rest under the mixing bowl for 20 minutes. Then knead it again, put it in an oiled bowl, cover the bowl with a lid, and let the whole thing sit in front of the heater for about 1 1/2 hours. (At this point in the process, I took the time to finish reading the recipe and became aware that I did not have enough time for both doughs to rise and rest for the full times proscribed by the recipe. The adjustments I made have been factored into the following.)

After letting the dough rise, punch it down, flatten it, then fold the corners together and re-form a ball. Let the dough again rose in front of the heater for about 45 minutes. Towards the end of the rising time, melt 4 tbsp butter and let cool.

Next comes the shaping. Cut the dough into quarters, then each quarter into 3 pieces. Pinch the corners of the dough pieces together at the bottom to make a good skin around the balls. You heard me. Pour the melted butter into a bowl and dip each roll into the butter.


Poppy/sesame seeds are optional (thanks to Wilma for the suggestion). Place the buttered balls into an 8x8 square baking dish. Cover, and let rise for another 45 minutes or so.

When the balls are rising, preheat the oven to 400˚. Place a cast iron pan at the bottom of the oven and a baking sheet on the lowest rack. Once the final rise has been completed, place a few ice cubes into the cast iron pan and place the baking dish onto the baking sheet. Bake 20 minutes until golden brown. Remove from pan and cool on a rack. Reheat gently before consuming. Praise whoever made them profusely.

Sunday, 21 November 2010

Sunday blues


Yesterday was supposed to be baking day. I had grand plans for Swedish cinnamon buns, or a test run of the dinner rolls I've been commissioned to make for T-giving. It was meant to rain all day, confirming the need for baked goods to be prepared.

Well, following an awe-inspiring sun-rain-shower at 8 AM, the predictions of downpours proved to be failures. Furthermore, my 4 hours of sleep the night before left me with something wanting in the energy department. A grand experiment with yeast and rising and patience was not in the cards.

Later that night, though, as I sat in Dani's kitchen struggling to keep my eyes open, baking something seemed the only possible way to alleviate the boredom of being at Dani's house while she hacked away on her computer and grumbled about how she hates watching TV with me and republicans. I turned to her mum's excellent recipe cut out collection and landed upon newspaper page from 1995. It was here that I discovered Peanut Butter Fudge Cookies. They needed a bit of adjustment - Dani managed to pause her computering for long enough to insist that I use butter (extra butter) instead of canola oil, and that I include chocolate chips. I also used hot chocolate mix, rather than unsweetened cocoa powder, and I halved the recipe.

Do it.

PBCC fudge cookies


* 4-5 tbsp butter
* 1/2 cup sugar
* 1/2 cup brown sugar
* 1/2 cup peanut butter
* 1 egg
* 1/2 tbsp vanilla
* 1/3 cup hot chocolate mix
* 1/2 cup flour
* 1/2 tsp baking soda
* pinch salt
* like, 1-2 cups chocolate chips

Preheat oven to 350˚.

If you are privileged enough to have access to a microwave, heat the butter in it for about 20 seconds. No need to melt it all, but it can be pretty melty. Mix butter with sugar and pb. Add the egg and vanilla. Add the hot choc (do this first to avoid cocoa lung), flour, baking soda and salt. Mix. Add choc chips. Mix again.

Use a spoon (you don't have to, but you should) to place cookies onto a baking sheet. Bake about 8-10 minutes. Let them cool/set on the baking sheet for 5 minutes before removing.


Keep out of sight of chocoholics and pb addicts.

Wednesday, 17 November 2010

Wanna have soup?


Earlier this week I was struck with a compulsion to bake something. It had been a busy week. I hadn't slept much the night before. I was worn out and tired, and baking is one of my most fool-proof stress relievers. Furthermore, I wanted cookies.

I met Wilma when I entered the kitchen, and told her I was planning to bake something. "No," was her response. Now, I realize that I might be slightly spoiled and that it is a rare and privileged fate to never hear "no" from one's mother. However, all that this really means for me is when I am shot down in such a forthright manner, I am more than a bit taken aback.

"Really?" I asked, crestfallen.
"Well, I would rather you make something with all the vegetables we have. Like soup."

She had a point. Our refrigerator was practically exploding with kale, spinach, and the like. So I took the rational path and proceeded to soup making.

I have never been one to follow a recipe for soup, unless it is something very specific, but it can be nice to have a reference. I consulted 101cookbooks' excellent ribollita recipe in this instance, but more or less just threw everything in a pot and let it work itself out.

Soup a la Bass

* 2 tbsp olive oil
* 1 onion
* 3 leeks
* 1 bunch kale
* 1 bunch spinach
* 1 can tomatoes (crushed is good, but whole is fine)
* 1 can cannellini beans
* 4 cups vegetable broth
* 1-4 tsp chili flakes
* water
(I did not have too much variety to throw into this soup, but other possible additions would be carrots, zucchini, celery, potatoes, etc.)

Chop everything. Heat the oil in a big pot. First add the onions and leeks and sautee over medium heat for about 10 minutes. If you have a carrot and/or celery, add this now also. Next add the kale and spinach, then the tomatoes. If the tomatoes are whole, break them up as you add them (hands are the best tool). Then comes the vegetable broth (I use cubes of stock and dissolve it in hot water, but ready made broth, or homemade is also acceptable).


The 101cookbooks recipe suggested mashing up some of the beans before adding them, and leaving the rest whole. I followed this method and was pleased with the results, as it gives more richness to the soup, but leaving all the cannellinis whole would be equally delicious.


Add more water until everything is covered and/or there is enough soup to satiate all the people you want to feed. Add the chili flakes. As far as I am concerned (as usual), more is merrier, but this is a matter of taste.

Monday, 15 November 2010

Lesbian Money


Aren't birthdays the best? Almost as fun can be when your friends have birthdays. This past weekend Becky turned 23. Deciding to step out of my comfort zone, I volunteered to contribute something sweet to the edible aspect of her party. Due to time constraints I planned to stick with the unfailing crowd pleaser - chocolate chip cookies. My trusty sidekick even consented to the use of her mini peanut butter cups in the cookies. After stopping at safeway for brown sugar and bubble gum, it seemed like everything was going to work out swimmingly. Until Dani started thinking.

"Let's make something chocolatey," she said. Personally, I see nothing un-chocolatey about chocolate chip cookies, but Dani's mind was made up. Whatever we were going to make had to have a significant chocolate to anything else ratio. We consulted two baking books before concluding that we would just have to make something up ourselves.

And so were born Chocolate Becky Cookies a la Dani.

Chocolate Beckies

* 2 1/4 cups flour
* 1 1/2 tsp baking soda
* 1/2-3/4 tsp salt
* 1/2 cup cocoa powder (unsweetened)
* 1 cup (2 sticks) butter (salted is good. I used one salted on unsalted)
* 3/4 cups brown sugar
* 3/4 cups white sugar
* 2 huevos
* 2 tsp vanilla extract
* hella teeny pb cups, some chopped, some not (at least 1 cup)


Preheat oven to 350˚.

Have your subordinate cream the butter and sugar together (again, wooden spoon is way more badass). Add the eggs and vanilla and combine well.

We had some troubles with the dry ingredient additions. Although I usually oppose mixing them separately before together, in this case it might have been a good idea to mix the cocoa powder with the flour, bs and salt. We did not do this, and I ended up with a serious case of cocoa lung. Also, it is best to pour in the dry ingredients in 3 or so additions. Lastly, add the pb cups. If you have chocolate chips, put these in too.


The dough is sticky, so using a teaspoon to get it onto the baking sheet was helpful. Bake for about 10 minutes (I actually have no idea how long they baked for, but I believe in your ability to assess when cookies are done baking). Let them sit on the baking sheet for 5-10 minutes before removing or they will be extremely mushy (which is awesome unless you are trying to transport them somewhere).

Yum.

Tuesday, 2 November 2010

Sconsicles


On Tuesday I made scones. Not only did I make scones, I made pumpkin scones. Not only did I make pumpkin scones, I made them for a bake sale hosted by some co-workers to benefit children in developing nations. I commenced writing this post with my usual edgy wit, making biting comments about how lame pumpkin baked goods are and how I'm too cool to care about children in the third world, but then I decided that I don't want to go to hell.

Sure, I find pumpkin baking just slightly too evocative of homemaker stereotypes, and women who spend the months of november and december slaving in the kitchen for ungrateful guests and claiming to love every minute of it (what? What issues?). I also generally elect not to participate in fund raising activities, especially those benefiting something as obscure and vast and distant as impoverished children in lands far away (sorry, I can't control my inner satan). Nonetheless, on Tuesday afternoon I found myself in the kitchen, holding a can of pumpkin, and scouring my brain for what I could contribute to the bake sale.

I landed on scones. Let's be real. Scones are delicious. Yes, they are kind of wimpy in that endearing British way, especially when exacerbated by the addition of pumpkin, but they are supereasy to throw together, and challenging to ruin.

I turned to my friend joyofbaking.com and came up with this:

Pumpkin sconsicles - no nuts and NO raisins

* 2 cups flour
* 1/3 cup brown sugar
* 1/2 tsp ground ginger
* 1/2 tsp ground cinnamon
* 1 tsp baking powder
* 1/2 tsp baking soda
* pinch o salt
* 1/2 cup cold butter
* 1/2 cup buttermilk
* 1/2 cup pureed pumpkin
* 1 tsp vanilla

Preheat oven to 400˚.

Mix the flour, brown sugar, ginger, cinnamon, bp, bs and salt. Crumble in the butter (most recipes will recommend a pastry cutter or two knives. I use my hands) until the mixture consists of many small balls of butter and dry ingredients.

Pour in the buttermilk and mix. Stir in the pumpkin and vanilla. Do not overmix. Divide the dough into two equal halves. Place one on a floured surface. This dough turned out pretty sticky, so I suggest using extra flour. Shape the dough into a pancake-like shape about 1 1/2 inches thick. Cut into 8 even pieces and place on a greased baking sheet. Repeat with the second half of dough. Yes, these are mini-scones. Adorable.

Bake in the preheated oven for 10-12 minutes. Remove, then cool on a rack.

Yumsicles.

Friday, 29 October 2010

Luz, Emma, Cat, Chris, and Rubio


Yesterday was Cat's birthday. Since I love her, I decided to make her a cake. And since I forgot Dani's half birthday, I allowed her to dictate what cake would be created for Cat's special day. With virtually no hesitation she landed on zucchini chocolate cake.
Yes. Zucchini cake. Open minded person that I am, I agreed that we could bring this cake dream of hers to fruition. We trekked through the rain to Trader Joe's, purchased our weight in beer, chocolate, and cucumbers and returned to my abode to commence the baking.

It was only once we had arrived home and loaded all the alcohol into the fridge that we realized we were missing the most crucial ingredient: zucchini. When I gently proposed making a non-zucchini cake, Dani lost her shit. In a frantic effort to avoid a full-on temper tantrum, I quickly suggested that we go up to 24th street to purchase a zucchini. Her face brightened immediately, and we set out to obtain the key ingredient.

Dani's mom kindly supplied us with this recipe from joyofbaking.com, with a few adjustments. We also used a springform pan rather than a loaf pan to maximize cake-like-ness.

Chocolate zucchini cake with weird but bomb frosting

* 1 1/2 cups shredded raw zucchini
* 1 cup flour
* 1/2 cup unsweetened cocoa powder
* 1 tsp baking soda
* 1/4 tsp baking powder
* 1/4 tsp salt
* dash of cinnamon
* 1/2 cup butter, melted (original calls for canola oil)
* 1/2 cup white sugar
* 1/2 cup brown sugar
* 2 eggies
* 1 tsp vanilla

Preheat oven to 350˚. Grease a springform pan, or another round cake pan.

Grate the zucchini and set aside. Mix flour, bp, bs, salt, cocoa powder and cinnamon. Mix the sugars with the melted butter. Mix in the eggs and vanilla. Add the zucchini. Slowly add the flour mixture and stir until all is combined and batter-like.

Pour batter into the greased pan and bake for 25-30 minutes. (If you do use a loaf pan, increase baking time to about 50 minutes).


Next came the frosting. I must give full credit to Dani for this magnificent experiment. It went something like this:

* 4 oz baking chocolate
*1/4 cup butter
* 1 1/3 cup baker's sugar
* 1 tsp vanilla
* pinch of salt
* 1/2 cup sour cream or creme fraiche

Melt baking chocolate with butter in a double boiler. Add 1/3 cup sugar (preferably baker's sugar) to the mixture. Remove from heat and let cool. Add the rest of the sugar, the vanilla and salt and mix well. Once mixture is fully cooled, stir in the sour cream. All we had on hand was European style sour cream, which is essentially creme fraiche, and I must say no one was complaining as we scooped gobs of extra frosting straight into our mouths.


When all was frosted and done, I believe everyone involved appreciated Dani's (mildly temperamental) adamant insistence on zucchini cake, myself included.


Sunday, 24 October 2010

I got a dollar


Buckwheat flour. I bought some earlier this year to make a cake, which turned out to be almost inedibly dry (although otherwise delicious), and have not since been able to find a use for the leftover flour. Until today.

I awoke with a hangover craving for french toast. Sadly, we had no good FT bread, so I turned to plan B. Pancakes. The slightly-lamer-than-french-toast-but-still-sweetish breakfast food. I had seen a recipe on foodnetwork.com for buckwheat pancakes previously and been intrigued, so I decided to just do it. I switched up the original recipe a tad. It called for only 3/4 cup whole wheat flour, but I found the batter too runny so I added about 1/4 cup more. I also had no baking powder, so I added extra baking soda and was not disappointed at the fluffy-factor of the pancakes. The choice to use golden syrup was somewhat questionable. Honey or brown sugar would have probably been better incorporated into the whole batter mixture, but the clumpy thickness of golden syrup contributed to some especially sweet bites in a few lucky pancakes. Fa sho.

Buckwheat pancakes
(Adapted from "Blueberry Buckwheat Pancake" recipe by Ellie Krieger)

* 3/4 cup buckwheat flour
* just under 1 cup whole wheat flour
* pinch of salt
* 2 tsp baking soda
* 2/3 cup milk
* 1 cup buttermilk*
* 2 eggs
* 1 tbsp golden syrup (or honey or sugar)
* 2 tbsp canola oil
* butter for the pan

Mix the dry ingredients in a bowl. In a separate bowl (or liquid measuring cup) mix the milk, buttermilk, eggs, oil and syrup or honey. Pour the wet ingredients into the dry ingredients and mix just until combined. Some lumps will remain and this is OK.

Heat a large nonstick pan over medium heat. Melt in the butter, then ladle the batter into the pan. Even with the extra flour, the pancakes tended to spread out a good amount, so no need to add huge amounts of batter for each pancake. Let them cook for about 2-3 minutes, then flip. Let cook on the other side for about a minute. Consume with maple syrup and/or cream cheese and/or jam and or nothing.


Yes I am obsessed with cream cheese and it is good on everything.

*Note: if you don't have buttermilk (why would you), you can easily make it by adding a tablespoon of white vinegar or lemon juice to a cup of milk

Saturday, 23 October 2010

Melted


Earlier this week I opened my fridge to find a brick of cheese staring back at me from the top shelf. And not just any cheese. Wilma had purchased a six pound block of Dubliner sharp cheddar. Her reasoning was somewhat logical - she planned to give half to Dani, who shares our love of/obsession with Dubliner cheese. I, of course, had no intention of allowing more than a few slices of the cheese leave my sight by any route aside from consumption by me. However, again I was foiled and the next day the cheese brick had been substantially diminished, no doubt with help from both Wilma and Dani.

Today I took matters into my own hand. If I can't have all the cheese, no one will have any. I determined to transform the cheese into a baked good. Luckily, my Big Book of Baking provided me with the perfect solution: Cheese and mustard scones. All it required was some serious grating and mixing and the scones became a reality. An extra cheesy reality, obviously. The scones were subsequently devoured by members of my mother's posse. All were highly appreciative and they even so generously left a piece of a scone for me to try. Heated up, it was sublime.

Cheese and Mustard Scones
(adapted from the Big Book and Baking)

* 4 tbsp butter
* 1 1/2 cup flour
* 3 tsp baking powder
* 1 tsp salt
* 1 1/2 (or more...) cups grated sharp cheddar cheese (recommended - Dubliner. Derr)
* 1 tsp mustard powder
* 2/3 cup milk, and some extra for brushing on top
* pepper/sesame seeds

Preheat oven to 425˚.

Mix flour, b.p. and salt. Cut butter into small pieces, then crumble it into the flour mixture with hands (the original recipe says to do this with fingertips, but I am too impatient for such delicateness, so I tend to just smoosh the butter into the dry ingredients and then break up the mixture into crumb-like pieces).

Stir in the cheese (in the end I used about 2 cups grated) and mustard powder. I used only one tsp as called for, but a tad more mustard probably would not hurt. Add the milk and stir until mixture becomes a soft dough. Lightly flour a surface for the dough. Shape the dough on the surface into a circle, about 1 inch tall. Cut into 8 wedges. Brush wedge with milk. Add some pepper on top, or not. We had no sesame seeds, but I reckon these would top off (literally. haha.) the scones nicely as well.


Place the wedges on a lightly greased cookie sheet and bake for 10-15 minutes until puffed and golden brown and flakily glorious. Eat with cheese, cream cheese, mustard, butter, or nothing.

Wednesday, 6 October 2010

Snicker snicker


On Wednesday I realized that I had never made snickerdoodles. My first response upon this epiphany was "who cares?" But, in an attempt to resist my typical desire to stick with something familiar that I make all the time, I decided to go for it. I was bored. I was uninspired. What other cookie could so perfectly complement these emotions?

And so commenced The Great Snickerdoodle Adventure (eh, still just sounds like a bad joke.)

I referred to a recipe from The Cookie and Biscuit Bible by Catherine Atkinson (I have to cite this stuff, right?), a magnificent book gifted to me by a magnificent Camila.

The original recipe called for chopped walnuts, which I replaced with some ground almonds. I also substituted nutmeg for some of the cinnamon, as I ran out of cinnamon. In conclusion, they would have been better with no nuts at all. Duh.

Snickerdoodlezzzzzz
* 1/2 cup butter (1 stick), room temp
* 1/2 cup sugar
* 1 tsp vanilla
* 2 eggs
* 1/4 cup milk
* 3 1/2 cups flour
* 1 tsp baking soda
* 1/4 cup ground almonds
topping:
* 5 tbsp sugar
* 1 tbsp cinnamon
* 1 tbsp nutmeg

Preheat oven to 375˚.

Cream the butter and sugar. Add eggs and vanilla and milk. Add flour and baking soda and mix.
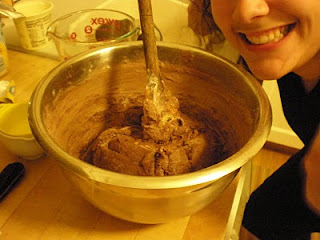
Mix in the almonds/walnuts/skip this step until it resembles this:


For the topping, mix the sugar and cinnamon/nutmeg in a shallow dish. Roll the dough into balls and roll them in the cinnamon sugar. I savvied up slightly after the first round of cookie shaping and rolling and took a more aggressive approach to coating the cookies. I found the really smashing them into the cinnamon sugar and attacking all sides (yes. sides of a ball.) in order to achieve optimal coating. Needless to say, the second batch was infinitely more... coated.


Place and cookies on a lightly greased cookie sheet and flatten slightly. Actually, flatten more than slightly as they don't really do any flattening on their own. For round 1 I ended up opening the oven mid-bake and pressing all the cookies down with the back on my wooden spoon in order to make them sufficiently flat. I would not recommend following this step. Those cookies turned out looking pretty ugly.


Bake in the preheated oven for about 10 minutes. In an effort to be less of a control freak I did not time the baking process, but I would caution that the cookies were a bit dry at the end, so underbaking is advisable.


Cooling on a rack is unnecessary, but if your mother is lurking nearby it is generally a good idea to use the rack in order to avoid being nagged.

Lastly, unload as many of these as you can on your friend(s) so you don't end up stuck with 30 mediocre cookies.


Or make tea and serve them to your parents.


Addendum: After writing this, I proceeded to go downstairs and finish the remaining cookies. I can't say for certain if this is a reflection on snickerdoodles or on me, but make of it what you will.

Monday, 4 October 2010

Dani made me

The title of this post is a phrase I often employ. In this instance, it has a double reference - firstly, yes, Dani made me create this web-based outlet for my food/writing obsession. Secondly - cookies. She made me. To be fair, I was the one who ultimately made the suggestion to make peanut butter oatmeal chocolate chip cookies yesterday afternoon, but I would never have actually done it if she hadn't made the proposal earlier in the week, and vehemently affirmed that we should make them following my mere passing idea. Honestly, when do I NOT inquire whether or not we should make cookies? I do not recall such a day. It is her generally well completed job to assure me that no, we should not make cookies. But yesterday she failed me. Needless to say, the most excellent, chewy, borderline painfully sweet cookies were produced yesterday afternoon in my (by my I mean my father's) kitchen.
Here's how:

* 2 sticks of butter. Room temp. If you don't have a microwave or patience (I possess neither), I find holding the sticks of butter just above a low flame on the stove for about a minute, or until your fingers can't take it anymore (what, I never said the process would be safe).
* 1 cup brown suger
* 1/2 cup white sugar. Dani pointed out that most chocolate chip cookie recipes call for 3/4 cups of each kind of sugar. This is incorrect.
* 2 eggs. The bigger the better.
* 2 tsp vanilla. The more the merrier.
* 2 cups all purpose flour. For puffier, less chewy and delicious cookies you can add another 1/4 cup or so of flour.
* 2 tsp baking soda
* 1 tsp salt
* 1 cup (or just over) rolled oats
* peanut butter. I never really measure in this step. I would say we added about 1/3 of a jar into this batch and it could have easily handled more.
* 1 bag chocolate chips. I say a whole bag because either a whole bag will go in and the cookies will be extra chocolate chippy and divine, or, more likely, some will be lost to the people helping you bake who insist on feasting upon the plain chips rather than patiently waiting for the cookies to come out but I won't mention any names.

Preheat the oven to 350˚ F.

Beat up the butter. Seriously, do this first to ensure that creaming the butter and sugar together is not a traumatizing experience. You can either use an electric apparatus or wooden spoon (the latter is far more gangster). Mix butter until it is soft and fluffy, then add both sugars and cream them together until extra soft and fluffy. Add the eggs and vanilla and mix well.

If you like to use more bowls then necessary, or have a pesky friend who insists of having a task to do, you are free to mix the dry ingredients separately. However, it is completely unnecessary. You can instead simply add the flour, baking soda and salt to the mixture and combine. Try to avoid getting to excited and coating your counter, your baking assistant, and yourself in flour. It happens, though.

Once the dough is dough-like, add the oats and combine. Then, the pb. Again, be free in this step. Finally, pour in all the chocolate chips, and give the whole thing one final, all encompassing stir.

Shaping and sizing the cookies is another step in which I will give full discretion to the reader. This is a very important decision, as some will only eat tiny, lame cookies, and others much prefer I cookie that, once devoured, actually allows you to feel like you have eaten something delicious and gained a few pounds. Either way is fine. Place the balls of dough, big or small, on a cookie sheet (there should be enough for about 4 sheets total, accounting for dough consumption). Put the sheet(s) in the oven and bake for 8-12 minutes, depending on how well done or practically raw and mind blowing you like your cookies.

Yum.