Sunday, 19 May 2013

Cloudy with a chance of limes

As I have mentioned previously, I was recently faced with the daunting task of making pie. After a successful run involving canned fruit, I stepped it up a tad with fresh pineapple-cherry pie. The other idea that had been tossed around was a lemon or lime pie. Citrus pies are a loophole in the rule of fruit pies that cost an arm and a leg to concoct (pineapple-cherry pie was clearly not), making both immensely appealing to my cheap side. Justin and I hit Trader Joe's for some lemons, limes and butter, then he had to go to work. I called Catey up and we went to Target. Her face brightened at the mention of lime pie as she recalled a key lime meringue pie she had sampled at Blue Heaven on a trip to Key West. Luckily, the internet led us right to the recipe. We got right to work (minus key limes, plus normal limes). It was so good that we ate the whole thing before Justin tried it, so I made another one.

Magical Vacation Lime Meringue Pie
Adapted from Blue Heaven Key Lime Pie

Crust Part:
- 3 cups graham cracker crumbs (original recipe called for 4 cups, but I think this was too much. On take two I used 3 cups and it was delicious)
- 1/2 stick of butter, melted
- 3/4 cup granulated sugar

Filling part:
- 1 cup lime juice (limes are really annoying to squeeze and don't yield a lot of juice, so we supplemented limes squeezed by Sophie with ready made lime juice)
- 2 cans (14 oz) sweetened condensed milk
- 8 egg yolks

Meringue part:
- 8 egg whites
- 1/2 tsp cream of tartar
- 1/3 cup powdered sugar

Preheat oven to 350˚.

First make the crust. Mix the graham cracker crust, melted butter and sugar together. Press the mixture into a 9 inch pie pan (use your hands and/or a spoon). Bake for 8 minutes, then remove to cool.

Have one of your trusty friends separate the eggs (thanks Luz!). Add the lime juice and sweetened condensed milk to the yolks and whisk together until well combined. Pour the filling into the pie crust and set aside. Use a kitchenaid or hand beaters to beat the egg whites to soft peaks. Add the cream of tartar and continue beating to stiff peaks. Add the sugar and beat until all whites are at stiff peaks. Dollop the mixture on top of the pie decoratively. A spoon or spatula is effective.

Bake for 15-30 minutes, or until meringue is mostly browned, but not entirely (the original recipe recommends testing the custard for doneness, but this was impractical to impossible with the height of the meringue. We based our decision to remove the pie on the meringue color alone).

Let cool for at least one hour before refrigerating. Let pie cool as long as humanly possible. Cut with a hot, wet serrated knife for best results. Yum.


Diced pineapples and cherries

About a week ago, I reached the last birthday milestone I will have until I start qualifying for social security: I turned 25 and can now rent a car without scaring the car rental companies with my youth. In honor of this magical day, Justin most thoughtfully gave me a cake stand. Shortly thereafter, he began demanding that I fill the cake stand with cakes. In the same sentence, he insisted that I use the rolling pin he gave me for Hannukah and the bag of whole wheat flour he gave me just because to make a pie. As you may have gathered from reading this blog, pie is not my forte. I have made many a pie in my day, but generally am intimidated either by the delicacy of pie crust or the price of a pound+ of fruit. That said, I had an immensely successful pie attempt recently using aforementioned whole wheat flour, along with some canned pineapple and jarred cherries (true, Julie and Sophie both encountered pits in their slices of pie, but no one died). I had first discovered this fruit combination when I made my first dump cake. What is dump cake, you may ask (assuming you did not grow up in rural Texas, where I believe it is quite well known)? Dump cake is something of a misnomer, as it more closely resembles a crumble. The "dump" part is also not what it sounds like (a garbage dump, obviously). Instead, it refers to the action of dumping a can of pineapple and a can of cherries into a pan, before dumping a box of yellow box cake mix on top and then delicately dumping chunks of butter on top. Bake for an hour and you have dump cake. Unsurprisingly, the union of cherries and pineapple results in a summery, pseudo tropical sweetness, enhanced by the crispy, buttery topping. The adapted pie form of dump cake looked something like this:
A few days after this pie was born (and immediately demolished), the baking bug struck again. I started with a lime meringue pie (post to come), assisted by Luz, Sophie and Catey, and then decided to move on to something with a non-graham cracker crust. I just so happened to have a whole fresh pineapple on hand. I had bought it for the purpose of consuming it as is, but after butchering the thing, it quickly became clear that a whole pineapple is a lot of pineapple. Justin had brought me some fresh cherries the day before, and these were also sitting around that evening. The idea of pitting a bag of cherries seriously clashed with my lazy style. Luckily, Catey was more than happy to rise to the occasion. While I threw together a pie crust, she halved and pitted each and every cherry. Here is how the rest went:

Pineapple-cherry pie from scratch

Pie crust part:
(adapted from Bob's Red Mill)
- 2 cups whole wheat flour (I used Bob's Red Mill because I'm classy)
- 3/4 cups butter (unsalted is good, but it's OK to use some salted if you like salt)
- 1 tsp salt
- 3-6 tbsp ice water (half the water can be substituted with vodka if you have some handy)

Pie part:
- 1 pineapple, diced (minus about 1 cup for eating)
- about 2 cups cherries, pitted
- 1/2 cup water
- 1/4-1/2 cup sugar (to taste. Also depends on sweetness of the fruit you are using)
- 4 tbsp cornstarch

If you have a food processor, use this to make the crust (if not, knives, a pie cutter or hands will work). Place the flour and salt in the food processor. Pulse a few times to blend. Add the butter, cut into chunks, and blend until the mixture is in course chunks. Add the water one tablespoon at a time, mixing after each addition. When the mixture comes together in one clump as it is mixed, the crust is done. Separate dough into two pieces, wrap in plastic wrap and refrigerate for about 30 minutes.

Preheat oven to 350˚ F. Roll out the larger piece of dough (one will be larger. No one is perfect) on a floured surface. Transfer the dough into an 8 inch pie pan. (Note: the whole wheat flour makes this dough very fragile. Don't be alarmed if it seems to be cracking or breaking more than usual. Just pinch it back together. Handle the dough as little as possible for maximum flakiness). Bake the crust for about 10-13 minutes, or until just starting to brown. (I didn't use pie weights and it turned out fine, but feel free to use something to keep the dough from shrinking or bubbling). Remove crust from the oven to cool.

While the crust is cooling, begin on the filling. Place the fruit, sugar and water in a medium pot. Bring water to boil then reduce heat to medium, stirring frequently. Simmer until fruit starts to cook down and the liquid is slightly syrupy, about 15-20 minutes. Add the corn starch and stir, still over low-medium heat, until the mixture thickens.
Roll out the other half of the dough on a floured surface. If your lovely friend gave you pie crust cutters for your birthday, use one to punch out cute shapes to decorate the top of the pie. If not, you can make a lattice, or just a full top crust. If you do a top crust, be sure to make some holes in the top for steam to escape.

Pour the filling into the crust and decorate the top with your design of choice. Bake for 35-45 minutes, or until crust is cooked through. Let cool for as long as you can resist before slicing and devouring.

Saturday, 27 October 2012

Oops I did it again

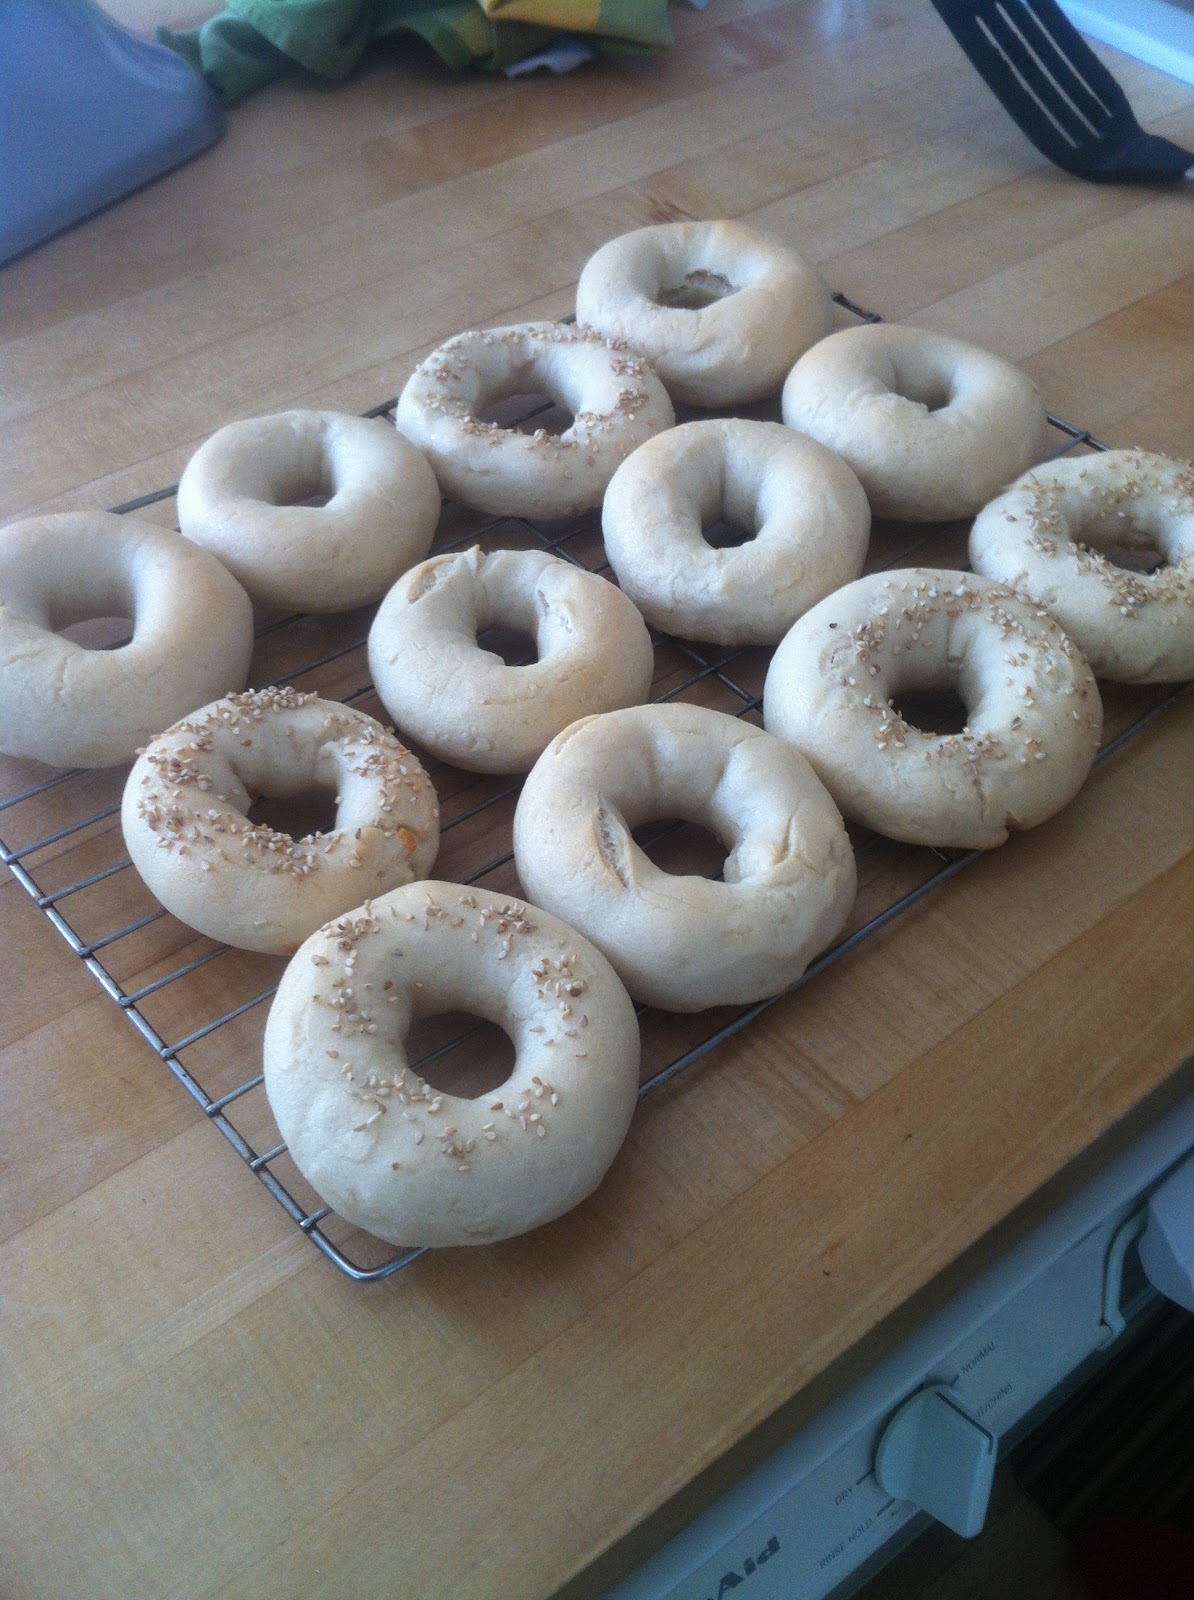
And by oops, I mean that is what everyone who missed out on these bagels should be thinking (cough Justin cough). As my loyal fans will recall, I recently concocted gluten free bagels with/for Cady. I was impressed with how easy the whole process was. Bread making is rarely too intellectually challenging, but it requires attention to detail and patience. I have been known to display attention to detail on occasion. Patience less so. That said, the manageable rising time of bagels was very appealing, so much so that I was determined to make gluten-full bagels. I found a recipe for New York style bagels (the only real kind) from the Sophisticated Gourmet and adapted it to include a kitchenaid.

Bass's Bagels

- 1 packet active dry yeast (2 1/4 tsp)
- 1 1/2 tbsp sugar
- 1 1/4 cups warm water
- 3 1/2 cups flour (and some more for kneading)
- 1 1/2 tsp salt
- finely chopped onion, about 1/4 cup (more or less depending on how many onion bagels you want. You can also add poppy/sesame seeds or whatever toppings you want)

Put the yeast and sugar in a bowl with 1/2 cup of the water. Let sit for 5 minutes without stirring, then mix until sugar and yeast dissolve.
 Place the flour and salt in the mixing bowl of your stand mixer (note: stand mixer not mandatory. You can do this by hand). Attach dough hook. Mix the dry ingredients until a well forms (or make a well). Pour in the yeast mixture.  Add another 1/2 cup of the water. Start mixing on medium speed. If the dough is too dry and floury, add more water in tablespoons until all is incorporated. Knead/mix for about 10 minutes. Add another tablespoon or so of flour to make a firm dough. 
Once the dough has been kneaded/dough hooked, pour a small amount of oil into the bowl and coat the dough. Cover with a damp dish towel and let rise for 1 hour in a warm place (I turned on the central heating, then went to run errands. Patience is challenging). Once the dough has risen, punch it down (literally), then let it rest for 10 minutes. Divide the dough into 8 pieces. Shape the dough into a ball, pulling the loose ends together at the bottom of the dough ball. Poke a hole in the center of each dough ball to form a ring. Note: this step differed from the previous bagel shaping technique Cady and I had used. Of the two, I think I prefer the latter. My unable-to-resist-critiquing father noted that the hole in these bagels did not all hold their hole shape. However, as anyone who has had a NY bagel knows, sometimes you can't see through the bagel. It is still superior too all other bagels.
Place the dough bagels on a cutting board or cookie sheet and cover with a damp towel. Let rest for 10 minutes. During this time, preheat oven to 425 degrees F and bring a large pot of water to boil (about 4 quarts). Once the water is boiling, reduce heat and gently lower the bagels in. Let them boil for 1-2 minutes on each side (2 minutes makes a chewier (read: better) bagel). Remove the bagels with a slotted spoon and place them on a greased cookie sheet. Beat an egg for a wash and brush each bagel with egg. Put the toppings on the bagels you are topping. I did some onions this time per aforementioned father's request. Once bagels are egg-washed and topped, place them in the oven and bake about 20 minutes, or until brown. Cool on a baking sheet. Eat with cream cheese, lox, butter, nothing. Lastly, I know I make most things look easy, but this is one accomplishment that I am convinced most could achieve. Do it.

Tuesday, 9 October 2012

Poppies

Once again, a beloved friend of mine celebrated reaching twenty-something-hood. Catey's 24th birthday was an extended celebration, beginning on the evening before her birthdate and ending (a week later) with cake. I asked Catey what she wanted for her birth treat a few days before the big day. "I'm glad you asked," she said. She requested that I recreate a poppy seed cake I had made in high school for another birthday party. Apparently the cake had left such an impression that Catey had spent the last 5 birthdays longing and pining for this cake. Well, finally we were in the same place at the right place. Her wish was my command. (I will also add that I received some flack for adapting Mollie Katzen's poppy seed cake recipe, which involved lemon, into a lemon-free poppy seed cake. To this I say haters to the left. The cake was off the chain. Again).

Poppy Seed Birthday Cake
Adapted from The New Moosewood Cookbook by Mollie Katzen

Cake Part:
- 3/4 cup poppy seeds
- 1 cup milk
- 2 sticks butter
- 1 cup sugar
- 3 eggs
- 2 cups flour
- 1 tbsp baking powder
- 1 tsp baking soda
- 1/2 tsp salt
- 1 tsp vanilla extract

Frosting Part:
- 8 oz cream cheese, room temp
- 8 oz butter, room temp
- 3/4 pound powdered sugar
- 1 tsp vanilla

Grease two 8" cake pans (the recipe called for a bundt or tube pan. I had neither, so I made  layer cake). Preheat oven to 350 degrees F. 

Pour the poppy seeds and milk in a saucepan. Heat on medium heat until just before the milk boils (aka scald the milk). Set aside. 
In your hand standy mixer, cream the butter and sugar together. Add the eggs one at a time, beating after each addition. In a separate bowl, mix the flour, b.p., b.s. and salt. Alternate adding the dry ingredients and the milk/poppy mixture to the creamed mixture, starting and ending with the milk. Beat until just combined after each addition. Mix in the vanilla. Divide the batter evenly into the two cake pans. 
 
Bake for 30-45 minutes (I checked the cake often because the baking time provided by Mollie's recipe was for a single large cake, rather than two. The bake time ended up being pretty close to that provided in the recipe). They will be done when they are golden brown and a toothpick comes out clean.
While the cake is baking, create the frosting. Note: Mollie's recipe does not call for cream cheese frosting. This decision was inspired by my childhood birthday celebrations. As my mum likes to reminisce, she always ordered me poppy seed cakes with cream cheese frosting, knowing full well that many children would not want all their the frosting and would donate the remnants to her plate. Genius. In conclusion, poppy seed cake (withOUT lemon) is perfectly complemented by cream cheese frosting (then again, what isn't)? Beat the butter and cream cheese together. Add the sugar, 1 cup or so at a time. Note: Many recipes call for more powdered sugar than I used, but I find that the sweetness overpowers the rest of the frosting and often the cake. Add sugar to taste. Beat in the vanilla.
Once the cakes are cooled, let the frosting begin. If you are lucky, maybe your boyfriend will put toothpicks in the cake (apparently this is a trick for frosting. It does leave you with the risk of getting splinters in your tongue, but the cake looked good). We served the cake at Catey's bar. It was yummy. Make this. PS. We decorated the cake the pieces of fresh fig because we are creative and resourceful. Do the same with whatever you want.

Saturday, 29 September 2012

Gums

I would not categorize myself as much more than a born this way Jew - I spent the high holy days this year working and noshing. From time to time, though, my heritage comes in handy. Despite our somewhat drippy prior baking project, Cady once again proposed that we collaborate on a celiac-friendly food item. This time, she was hankering after bagels. Since the obliteration of gluten from her diet, Cady has searched high and low for a bagel that will not land her in sicksville. Although she has tasted numerous gluten-free "bagels," none have quite lived up to their name. As all good Jews know, it is not a real bagel unless it is boiled, then baked. Unfortunately, the whole world has not cottoned on to this fact. Some people undoubtedly believe that if a bagel does not contain all-purpose flour should be exempt from the crucial boiling process. This is a misconception that, with little time and effort, we quickly put to rest. We secured time in the kitchen at Chez Parental Units and set to work. This time we pretty much followed a recipe.

Note: some comments at the bottom of the recipe indicated that not just any gluten-free flour will work for this recipe. The flour must contained xanthan gum or some xanthan gum must be added. After searching at a small health food store and being pointed to the chewing gum aisle, I ended upon the phone with Whole Foods. I was reassured that they stock xanthan gum, but upon my arrival I was disappointed to find that they had sold out. Luckily, the wonderful Jessica's section at WF is the baking aisle. She pointed me to a highly recommended gluten-free flour that contained guar gum. MacBass (my iPhone) reassured me that guar gum can be a substitute for xanthan gum. I bought the flour and abandoned the xanthan.

Gluten-Free Bagels
adapted from Delight Gluten Free Magazine

- 2 cups warm water
- 2 packets active quick-rise yeast
- 3 cups gluten-free flour containing guar gum or xanthan gum
- 2 1/2 cups regular gluten free flour
- 3 tbsp sugar
- 2 tsp salt
- 2 quarts boiling water
- 2 tsp canola oil (or, as Cady pointed out, "some" oil is fine)

First, locate the dough hook attachment for your kitchenaid. It might be hiding in your old bedroom. For those who are unsure, the dough hook is pictured on the right.
 
Mix the warm water with the yeast in a small bowl. Let yeast dissolve about 5 minutes. In your stand mixer, combine the flour, sugar and salt using the dough hook. A well should form in the middle of the dry mixture (it is OK to aid the well-creation process slightly with your hands. As much as I love kitchie, baking without one's hands is not baking). Pour the yeast mixture into the well and mix on medium speed until a dough forms. Cover the dough with plastic wrap and allow the dough to rest for 10 minutes, as it will be tired.
 
Once the dough has rested, place it on a flat surface and divide into 12 pieces. Roll the pieces into the dough into about 1 inch thick logs. Form the logs into round bagel-like shapes, securely attaching both ends.

 
Place the dough bagels on a baking sheet, cover with a dish towel and let them rise for 30-40 minutes. The dough should rise during this time (we were unsure how much they really rose, but it all worked out in the end). While the dough is rising, preheat the oven to 400 degrees F and boil two quarts of water in a large pot on the stove. Once the water is boiling, pour in the canola oil. After the bagels have risen, gently place them about 4 at a time into the pot. Poach them for about 30-45 seconds, then remove them onto a greased baking sheet (make sure whatever is used to grease the sheet is gluten-free!). A slotted spoon did the transfer quite successfully. Feel free to sprinkle on some sesame or poppy seeds. Place the dough in the oven. The recipe said they should bake for 15-18 minutes, but ours needed a tad longer to reach golden brown perfection (about 25 minutes. They remained on the pale side but nicely browned on the bottom). Eat bagels plain, buttered, cream cheesed or however your heart desires. Don't be alarmed by the likeness of these bagels to gluten-full bagels.

Monday, 24 September 2012

Explosive

My dear celiac friend Cady recently made a special request. Cady, as you may recall, was the gracious donator of my delightful dresser. Her reward for this generosity was these gluten free peanut butter cookies. Although she did enjoy the cookies, this time she was hankering after a more intricate treat she had recently experienced: gluten-free strawberry meringue pie. She assured me that this was a real thing and, indebted to her as I am, I signed on to assist with this project. She invited me to her lovely (and admittedly quite compact) home one night, asking only that I bring lemon curd, as she had no idea that such a thing existed. Well, it turns out the entire mission district has no idea that lemon curd exists. I searched high and low before asking god (read: my iPhone) for advice. Alton Brown's recipe for lemon curd appeared simple. I purchased the necessary lemons and butter and trudged on to Chez Cady and Joseph. After a brief moment of gawking at the hipster mob in front of Cady's apartment waiting to eat at Mission Chinese Food restaurant, I rushed upstairs and we set to work. "So," Cady said with utmost confidence, "I just picked the first recipe that came up on google. Also I hate recipes." I assured her that I would have done the same, and that I too found recipes to often restrict my creative tendencies. I glanced through the one she had found and determined that we would have to do some tweaking. After another glance, I decided that we were going to make our own recipe. For an alternate and perhaps less drawn out and tiresome summation of events, see Cady's blog:

Cady and Marissa Have a Little Too Much Fun Inventing This Gluten Free Strawberry Meringue Pie Recipe
Adapted from some places

Crust Part
- about 1 cup crushed gluten free graham crackers (not too shabby, I might add), crushed with a rolling pin or some other crushing device
- 4 tbsp melted butter
- scant 1/3 cup sugar

Filling Part
- two containers strawberries, sliced (about 4 cups)
- 5 egg yolks
- 1 cup sugar
- 4 lemons
- 1 stick butter

Meringue Part
- 5 egg whites
- a pinch of cream of tartar
- 1-2 tsp vanilla
- some sugar?

First, make the crust. Preheat oven to 375 degrees F. Mix together the crushed graham cracker crumbs, butter and sugar, then spread into a pie dish. This made a somewhat low crust, so if you want more crust, add more of each ingredient (proportionally, derr). Bake for about 10 minutes then remove and cool. 
Next, make the lemon curd/filling. Zest and juice the lemons. The recipe said to use only 1/3 cup of lemon juice, so I only used juice from about 3 of them. Prepare a double boiler set up: this can involve a heat resistant bowl and a saucepan. Fill the saucepan with about 1 inch of water. Bring to a boil, then reduce to simmer. In the bowl, mix the egg yolks and sugar (I might have mixed the juice and sugar first, which might have affected the thickening of the curd, and by affected I might mean prevented. Do as I say, not as I do). Pour in the lemon juice and zest and place the bowl on top of the saucepan. Whisk until mixture thickens (Note: if it does not thicken, tell me because it means it was the recipe's fault and not mine). Remove from heat. Mix together the strawberries and "lemon curd" substance (if the "lemon curd" is extremely runny, maybe just add a little and not the entire thing). 
Next, make the meringue. Use electric beaters to whip the egg whites to soft peaks. Once they reach soft peaks, add the cream of tartar, vanilla and sugar. Note: not much sugar is required. We just threw some in and it turned out tasty. 
Lastly, assemble and bake. Decrease the oven heat to 325 degrees. Pour the strawberry mixture into the pie crust. If it looks very wet (which it did), throw in some gluten free flour and mix. This may or may not make a difference. Scoop the meringue mixture on top of the strawberries. Place a baking sheet under the pie dish and bake for 20-30 minutes.
Final note: our pie ended up erupting all over poor Cady and Joseph's oven. When we removed the pie to cool on top of the stove, it continued erupting slowly and steadily for a good 15 minutes before juice started spilling out each and every opening in the oven. This was because we put too much liquid and stuff into the pie. Woops. It was still delicious and provided the inspiration for C and J to make strawberry meringue pie oatmeal the next day. Tasty!

Saturday, 22 September 2012

Blowtorch

Certain people prefer salty flavors to sweet. Generally speaking I am perplexed by such a concept; salty is wonderful and necessary, but sweets are like breaths of fresh air. That said, it was recently the birthdate of one such saltophile: the delightful Emma. While Emma does not shun cookies when they are placed in front of her, the thought of sugar mounds does not increase her heart rate and widen her eyes with glee. That is, with the exception of creme brulée. She waxes poetic at the thought of this treat, often scheming to cross the city in search of the torched dessert. Alas, I myself don't own the essential ingredient for Creme brulée: a blowtorch. I was not sure how impressed Emma would be by a non bruleed Creme dish. I researched a tad on foodnetwork and found the answer in a cupcake wars winner recipe for Creme brûlée cupcakes. It was going to be quite an undertaking; not only was there a cake, a filling and a frosting component, but most of the ingredients were listed in ounces. Furthermore, I was unable to obtain the dulce de leche component crucial to the caramel frosting. Nonetheless, Emma's birthday joy (birthjoy) was worth all the conversions and assemblages. Here's how it went:

Creme Bruleé Cupcakes
adapted from Cupcake Wars contestant Megan Faulkner Brown (I did the conversions for you)

Cake part
- 2 1/4 cups flour
- 1 cup brown sugar
- 1 1/2 tsp baking soda
- 1 tsp salt
- 1 cup sour cream
- 2 1/2 eggs (5 oz of eggs? Really? I used 3)
- scant 1/2 cup vegetable oil
- scant half cup ready made vanilla pudding
- 1/4 cup buttermilk
- 1 1/2 tsp vanilla

Filling part
- 1/4 cup white sugar
- 1 tsp vanilla bean (the recipe called for vanilla bean paste. I couldn't find this (and assumed it would be ridiculously expensive). Luckily, I had a whole vanilla bean lying around and scraped out the inside)
- 4 eggs yolks
- 1 1/2 cups heavy cream

Frosting part
- 2 sticks butter, room temp
- 4 oz cream cheese, room temp
- 1 pound powdered sugar
- 1/4 cup + 2 tbsp caramel (recipe below)
- 1/4 cup + 2 tbsp evaporated milk
- 1 1/2 tsp vanilla

First, make the cupcakes. Preheat oven to 350 degrees F. Line a cupcake pan with cupcake holders. Mix flour, brown sugar, baking soda, and salt in a mixing bowl. Add the sour cream, eggs, vegetable oil, pudding, buttermilk and vanilla to the bowl and mix on low speed until combined. Do a quick scrape and mix with a spatula. Fill the cupcake holders about 2/3 full (or a little more). Bake for about 20 minutes, or until slightly browned. Cool the cupcakes on a rack.
Next make the creme bruleé filling. Reduce oven heat to 325 degrees. Whisk together the sugar, vanilla bean and egg yolks together in a bowl. 
Add the cream slowly and continue whisking until combined. Pour the mixture into a 9x9 baking dish. Place the dish on a baking sheet in the oven. Pour 2 cups of water onto the baking sheet (water bath). Bake until the pudding has set. Cool the creme bruleé completely.

Lastly, make the frosting. In order to this, I had to improvise. I looked up a recipe for dulce de leche, but it took a very long time and required additional ingredients. My laziness problem obliged me to investigate other forms of caramel. I landed on a basic caramel recipe:

Caramel Sauce
from simplyrecipes.com

- 1 cup sugar
- 6 tbsp butter
- 1/2 cup heavy cream

Heat the sugar in a heavy bottomed pan. Whisk the sugar as it starts to melt. When the sugar comes to a boil, stop stirring. Once all the sugar is melted and is a "dark amber" color, add the butter immediately and whisk together. Remove the pan from the heat, count to three and slowly add the cream. The sauce will bubble somewhat violently, so watch your hands. Allow the caramel to cool for a time, then proceed with the frosting.

Beat together the butter and cream cheese in a stand mixer until combined. Slowly add half the powdered sugar. Mix on low for 30 seconds, then on medium until fully combined. Add the rest of the powdered sugar, the caramel, evaporated milk and the vanilla. Beat again until fully mixed and creamy.
To turn these components into creme bruleé cupcakes, obtain piping tips and a plastic bag (if you have pastry bags, all the better). Fill the bag with the creme brulee. Use a knife to carefully cut small holes in the cupcakes and pipe the filling into these holes. Frost the cupcakes (you can either use another piping bag, or just use a knife, which is what I did, obviously). Sprinkle each frosted top with about 1 tsp granulated sugar. Use the handy torch lighter you purchased earlier that day to bruleé the tops of cupcakes. Pat yourself on the back and share with the birthday girl.