Saturday, 27 October 2012

Oops I did it again

And by oops, I mean that is what everyone who missed out on these bagels should be thinking (cough Justin cough). As my loyal fans will recall, I recently concocted gluten free bagels with/for Cady. I was impressed with how easy the whole process was. Bread making is rarely too intellectually challenging, but it requires attention to detail and patience. I have been known to display attention to detail on occasion. Patience less so. That said, the manageable rising time of bagels was very appealing, so much so that I was determined to make gluten-full bagels. I found a recipe for New York style bagels (the only real kind) from the Sophisticated Gourmet and adapted it to include a kitchenaid.

Bass's Bagels

- 1 packet active dry yeast (2 1/4 tsp)
- 1 1/2 tbsp sugar
- 1 1/4 cups warm water
- 3 1/2 cups flour (and some more for kneading)
- 1 1/2 tsp salt
- finely chopped onion, about 1/4 cup (more or less depending on how many onion bagels you want. You can also add poppy/sesame seeds or whatever toppings you want)

Put the yeast and sugar in a bowl with 1/2 cup of the water. Let sit for 5 minutes without stirring, then mix until sugar and yeast dissolve.
 Place the flour and salt in the mixing bowl of your stand mixer (note: stand mixer not mandatory. You can do this by hand). Attach dough hook. Mix the dry ingredients until a well forms (or make a well). Pour in the yeast mixture.  Add another 1/2 cup of the water. Start mixing on medium speed. If the dough is too dry and floury, add more water in tablespoons until all is incorporated. Knead/mix for about 10 minutes. Add another tablespoon or so of flour to make a firm dough. 
Once the dough has been kneaded/dough hooked, pour a small amount of oil into the bowl and coat the dough. Cover with a damp dish towel and let rise for 1 hour in a warm place (I turned on the central heating, then went to run errands. Patience is challenging). Once the dough has risen, punch it down (literally), then let it rest for 10 minutes. Divide the dough into 8 pieces. Shape the dough into a ball, pulling the loose ends together at the bottom of the dough ball. Poke a hole in the center of each dough ball to form a ring. Note: this step differed from the previous bagel shaping technique Cady and I had used. Of the two, I think I prefer the latter. My unable-to-resist-critiquing father noted that the hole in these bagels did not all hold their hole shape. However, as anyone who has had a NY bagel knows, sometimes you can't see through the bagel. It is still superior too all other bagels.
Place the dough bagels on a cutting board or cookie sheet and cover with a damp towel. Let rest for 10 minutes. During this time, preheat oven to 425 degrees F and bring a large pot of water to boil (about 4 quarts). Once the water is boiling, reduce heat and gently lower the bagels in. Let them boil for 1-2 minutes on each side (2 minutes makes a chewier (read: better) bagel). Remove the bagels with a slotted spoon and place them on a greased cookie sheet. Beat an egg for a wash and brush each bagel with egg. Put the toppings on the bagels you are topping. I did some onions this time per aforementioned father's request. Once bagels are egg-washed and topped, place them in the oven and bake about 20 minutes, or until brown. Cool on a baking sheet. Eat with cream cheese, lox, butter, nothing. Lastly, I know I make most things look easy, but this is one accomplishment that I am convinced most could achieve. Do it.
Tuesday, 9 October 2012

Poppies

Once again, a beloved friend of mine celebrated reaching twenty-something-hood. Catey's 24th birthday was an extended celebration, beginning on the evening before her birthdate and ending (a week later) with cake. I asked Catey what she wanted for her birth treat a few days before the big day. "I'm glad you asked," she said. She requested that I recreate a poppy seed cake I had made in high school for another birthday party. Apparently the cake had left such an impression that Catey had spent the last 5 birthdays longing and pining for this cake. Well, finally we were in the same place at the right place. Her wish was my command. (I will also add that I received some flack for adapting Mollie Katzen's poppy seed cake recipe, which involved lemon, into a lemon-free poppy seed cake. To this I say haters to the left. The cake was off the chain. Again).

Poppy Seed Birthday Cake
Adapted from The New Moosewood Cookbook by Mollie Katzen

Cake Part:
- 3/4 cup poppy seeds
- 1 cup milk
- 2 sticks butter
- 1 cup sugar
- 3 eggs
- 2 cups flour
- 1 tbsp baking powder
- 1 tsp baking soda
- 1/2 tsp salt
- 1 tsp vanilla extract

Frosting Part:
- 8 oz cream cheese, room temp
- 8 oz butter, room temp
- 3/4 pound powdered sugar
- 1 tsp vanilla

Grease two 8" cake pans (the recipe called for a bundt or tube pan. I had neither, so I made  layer cake). Preheat oven to 350 degrees F. 

Pour the poppy seeds and milk in a saucepan. Heat on medium heat until just before the milk boils (aka scald the milk). Set aside. 
In your hand standy mixer, cream the butter and sugar together. Add the eggs one at a time, beating after each addition. In a separate bowl, mix the flour, b.p., b.s. and salt. Alternate adding the dry ingredients and the milk/poppy mixture to the creamed mixture, starting and ending with the milk. Beat until just combined after each addition. Mix in the vanilla. Divide the batter evenly into the two cake pans. 
 
Bake for 30-45 minutes (I checked the cake often because the baking time provided by Mollie's recipe was for a single large cake, rather than two. The bake time ended up being pretty close to that provided in the recipe). They will be done when they are golden brown and a toothpick comes out clean.
While the cake is baking, create the frosting. Note: Mollie's recipe does not call for cream cheese frosting. This decision was inspired by my childhood birthday celebrations. As my mum likes to reminisce, she always ordered me poppy seed cakes with cream cheese frosting, knowing full well that many children would not want all their the frosting and would donate the remnants to her plate. Genius. In conclusion, poppy seed cake (withOUT lemon) is perfectly complemented by cream cheese frosting (then again, what isn't)? Beat the butter and cream cheese together. Add the sugar, 1 cup or so at a time. Note: Many recipes call for more powdered sugar than I used, but I find that the sweetness overpowers the rest of the frosting and often the cake. Add sugar to taste. Beat in the vanilla.
Once the cakes are cooled, let the frosting begin. If you are lucky, maybe your boyfriend will put toothpicks in the cake (apparently this is a trick for frosting. It does leave you with the risk of getting splinters in your tongue, but the cake looked good). We served the cake at Catey's bar. It was yummy. Make this. PS. We decorated the cake the pieces of fresh fig because we are creative and resourceful. Do the same with whatever you want.

Saturday, 29 September 2012

Gums

I would not categorize myself as much more than a born this way Jew - I spent the high holy days this year working and noshing. From time to time, though, my heritage comes in handy. Despite our somewhat drippy prior baking project, Cady once again proposed that we collaborate on a celiac-friendly food item. This time, she was hankering after bagels. Since the obliteration of gluten from her diet, Cady has searched high and low for a bagel that will not land her in sicksville. Although she has tasted numerous gluten-free "bagels," none have quite lived up to their name. As all good Jews know, it is not a real bagel unless it is boiled, then baked. Unfortunately, the whole world has not cottoned on to this fact. Some people undoubtedly believe that if a bagel does not contain all-purpose flour should be exempt from the crucial boiling process. This is a misconception that, with little time and effort, we quickly put to rest. We secured time in the kitchen at Chez Parental Units and set to work. This time we pretty much followed a recipe.

Note: some comments at the bottom of the recipe indicated that not just any gluten-free flour will work for this recipe. The flour must contained xanthan gum or some xanthan gum must be added. After searching at a small health food store and being pointed to the chewing gum aisle, I ended upon the phone with Whole Foods. I was reassured that they stock xanthan gum, but upon my arrival I was disappointed to find that they had sold out. Luckily, the wonderful Jessica's section at WF is the baking aisle. She pointed me to a highly recommended gluten-free flour that contained guar gum. MacBass (my iPhone) reassured me that guar gum can be a substitute for xanthan gum. I bought the flour and abandoned the xanthan.

Gluten-Free Bagels
adapted from Delight Gluten Free Magazine

- 2 cups warm water
- 2 packets active quick-rise yeast
- 3 cups gluten-free flour containing guar gum or xanthan gum
- 2 1/2 cups regular gluten free flour
- 3 tbsp sugar
- 2 tsp salt
- 2 quarts boiling water
- 2 tsp canola oil (or, as Cady pointed out, "some" oil is fine)

First, locate the dough hook attachment for your kitchenaid. It might be hiding in your old bedroom. For those who are unsure, the dough hook is pictured on the right.
 
Mix the warm water with the yeast in a small bowl. Let yeast dissolve about 5 minutes. In your stand mixer, combine the flour, sugar and salt using the dough hook. A well should form in the middle of the dry mixture (it is OK to aid the well-creation process slightly with your hands. As much as I love kitchie, baking without one's hands is not baking). Pour the yeast mixture into the well and mix on medium speed until a dough forms. Cover the dough with plastic wrap and allow the dough to rest for 10 minutes, as it will be tired.
 
Once the dough has rested, place it on a flat surface and divide into 12 pieces. Roll the pieces into the dough into about 1 inch thick logs. Form the logs into round bagel-like shapes, securely attaching both ends.

 
Place the dough bagels on a baking sheet, cover with a dish towel and let them rise for 30-40 minutes. The dough should rise during this time (we were unsure how much they really rose, but it all worked out in the end). While the dough is rising, preheat the oven to 400 degrees F and boil two quarts of water in a large pot on the stove. Once the water is boiling, pour in the canola oil. After the bagels have risen, gently place them about 4 at a time into the pot. Poach them for about 30-45 seconds, then remove them onto a greased baking sheet (make sure whatever is used to grease the sheet is gluten-free!). A slotted spoon did the transfer quite successfully. Feel free to sprinkle on some sesame or poppy seeds. Place the dough in the oven. The recipe said they should bake for 15-18 minutes, but ours needed a tad longer to reach golden brown perfection (about 25 minutes. They remained on the pale side but nicely browned on the bottom). Eat bagels plain, buttered, cream cheesed or however your heart desires. Don't be alarmed by the likeness of these bagels to gluten-full bagels.

Monday, 24 September 2012

Explosive

My dear celiac friend Cady recently made a special request. Cady, as you may recall, was the gracious donator of my delightful dresser. Her reward for this generosity was these gluten free peanut butter cookies. Although she did enjoy the cookies, this time she was hankering after a more intricate treat she had recently experienced: gluten-free strawberry meringue pie. She assured me that this was a real thing and, indebted to her as I am, I signed on to assist with this project. She invited me to her lovely (and admittedly quite compact) home one night, asking only that I bring lemon curd, as she had no idea that such a thing existed. Well, it turns out the entire mission district has no idea that lemon curd exists. I searched high and low before asking god (read: my iPhone) for advice. Alton Brown's recipe for lemon curd appeared simple. I purchased the necessary lemons and butter and trudged on to Chez Cady and Joseph. After a brief moment of gawking at the hipster mob in front of Cady's apartment waiting to eat at Mission Chinese Food restaurant, I rushed upstairs and we set to work. "So," Cady said with utmost confidence, "I just picked the first recipe that came up on google. Also I hate recipes." I assured her that I would have done the same, and that I too found recipes to often restrict my creative tendencies. I glanced through the one she had found and determined that we would have to do some tweaking. After another glance, I decided that we were going to make our own recipe. For an alternate and perhaps less drawn out and tiresome summation of events, see Cady's blog:

Cady and Marissa Have a Little Too Much Fun Inventing This Gluten Free Strawberry Meringue Pie Recipe
Adapted from some places

Crust Part
- about 1 cup crushed gluten free graham crackers (not too shabby, I might add), crushed with a rolling pin or some other crushing device
- 4 tbsp melted butter
- scant 1/3 cup sugar

Filling Part
- two containers strawberries, sliced (about 4 cups)
- 5 egg yolks
- 1 cup sugar
- 4 lemons
- 1 stick butter

Meringue Part
- 5 egg whites
- a pinch of cream of tartar
- 1-2 tsp vanilla
- some sugar?

First, make the crust. Preheat oven to 375 degrees F. Mix together the crushed graham cracker crumbs, butter and sugar, then spread into a pie dish. This made a somewhat low crust, so if you want more crust, add more of each ingredient (proportionally, derr). Bake for about 10 minutes then remove and cool. 
Next, make the lemon curd/filling. Zest and juice the lemons. The recipe said to use only 1/3 cup of lemon juice, so I only used juice from about 3 of them. Prepare a double boiler set up: this can involve a heat resistant bowl and a saucepan. Fill the saucepan with about 1 inch of water. Bring to a boil, then reduce to simmer. In the bowl, mix the egg yolks and sugar (I might have mixed the juice and sugar first, which might have affected the thickening of the curd, and by affected I might mean prevented. Do as I say, not as I do). Pour in the lemon juice and zest and place the bowl on top of the saucepan. Whisk until mixture thickens (Note: if it does not thicken, tell me because it means it was the recipe's fault and not mine). Remove from heat. Mix together the strawberries and "lemon curd" substance (if the "lemon curd" is extremely runny, maybe just add a little and not the entire thing). 
Next, make the meringue. Use electric beaters to whip the egg whites to soft peaks. Once they reach soft peaks, add the cream of tartar, vanilla and sugar. Note: not much sugar is required. We just threw some in and it turned out tasty. 
Lastly, assemble and bake. Decrease the oven heat to 325 degrees. Pour the strawberry mixture into the pie crust. If it looks very wet (which it did), throw in some gluten free flour and mix. This may or may not make a difference. Scoop the meringue mixture on top of the strawberries. Place a baking sheet under the pie dish and bake for 20-30 minutes.
Final note: our pie ended up erupting all over poor Cady and Joseph's oven. When we removed the pie to cool on top of the stove, it continued erupting slowly and steadily for a good 15 minutes before juice started spilling out each and every opening in the oven. This was because we put too much liquid and stuff into the pie. Woops. It was still delicious and provided the inspiration for C and J to make strawberry meringue pie oatmeal the next day. Tasty!

Saturday, 22 September 2012

Blowtorch

Certain people prefer salty flavors to sweet. Generally speaking I am perplexed by such a concept; salty is wonderful and necessary, but sweets are like breaths of fresh air. That said, it was recently the birthdate of one such saltophile: the delightful Emma. While Emma does not shun cookies when they are placed in front of her, the thought of sugar mounds does not increase her heart rate and widen her eyes with glee. That is, with the exception of creme brulée. She waxes poetic at the thought of this treat, often scheming to cross the city in search of the torched dessert. Alas, I myself don't own the essential ingredient for Creme brulée: a blowtorch. I was not sure how impressed Emma would be by a non bruleed Creme dish. I researched a tad on foodnetwork and found the answer in a cupcake wars winner recipe for Creme brûlée cupcakes. It was going to be quite an undertaking; not only was there a cake, a filling and a frosting component, but most of the ingredients were listed in ounces. Furthermore, I was unable to obtain the dulce de leche component crucial to the caramel frosting. Nonetheless, Emma's birthday joy (birthjoy) was worth all the conversions and assemblages. Here's how it went:

Creme Bruleé Cupcakes
adapted from Cupcake Wars contestant Megan Faulkner Brown (I did the conversions for you)

Cake part
- 2 1/4 cups flour
- 1 cup brown sugar
- 1 1/2 tsp baking soda
- 1 tsp salt
- 1 cup sour cream
- 2 1/2 eggs (5 oz of eggs? Really? I used 3)
- scant 1/2 cup vegetable oil
- scant half cup ready made vanilla pudding
- 1/4 cup buttermilk
- 1 1/2 tsp vanilla

Filling part
- 1/4 cup white sugar
- 1 tsp vanilla bean (the recipe called for vanilla bean paste. I couldn't find this (and assumed it would be ridiculously expensive). Luckily, I had a whole vanilla bean lying around and scraped out the inside)
- 4 eggs yolks
- 1 1/2 cups heavy cream

Frosting part
- 2 sticks butter, room temp
- 4 oz cream cheese, room temp
- 1 pound powdered sugar
- 1/4 cup + 2 tbsp caramel (recipe below)
- 1/4 cup + 2 tbsp evaporated milk
- 1 1/2 tsp vanilla

First, make the cupcakes. Preheat oven to 350 degrees F. Line a cupcake pan with cupcake holders. Mix flour, brown sugar, baking soda, and salt in a mixing bowl. Add the sour cream, eggs, vegetable oil, pudding, buttermilk and vanilla to the bowl and mix on low speed until combined. Do a quick scrape and mix with a spatula. Fill the cupcake holders about 2/3 full (or a little more). Bake for about 20 minutes, or until slightly browned. Cool the cupcakes on a rack.
Next make the creme bruleé filling. Reduce oven heat to 325 degrees. Whisk together the sugar, vanilla bean and egg yolks together in a bowl. 
Add the cream slowly and continue whisking until combined. Pour the mixture into a 9x9 baking dish. Place the dish on a baking sheet in the oven. Pour 2 cups of water onto the baking sheet (water bath). Bake until the pudding has set. Cool the creme bruleé completely.

Lastly, make the frosting. In order to this, I had to improvise. I looked up a recipe for dulce de leche, but it took a very long time and required additional ingredients. My laziness problem obliged me to investigate other forms of caramel. I landed on a basic caramel recipe:

Caramel Sauce
from simplyrecipes.com

- 1 cup sugar
- 6 tbsp butter
- 1/2 cup heavy cream

Heat the sugar in a heavy bottomed pan. Whisk the sugar as it starts to melt. When the sugar comes to a boil, stop stirring. Once all the sugar is melted and is a "dark amber" color, add the butter immediately and whisk together. Remove the pan from the heat, count to three and slowly add the cream. The sauce will bubble somewhat violently, so watch your hands. Allow the caramel to cool for a time, then proceed with the frosting.

Beat together the butter and cream cheese in a stand mixer until combined. Slowly add half the powdered sugar. Mix on low for 30 seconds, then on medium until fully combined. Add the rest of the powdered sugar, the caramel, evaporated milk and the vanilla. Beat again until fully mixed and creamy.
To turn these components into creme bruleé cupcakes, obtain piping tips and a plastic bag (if you have pastry bags, all the better). Fill the bag with the creme brulee. Use a knife to carefully cut small holes in the cupcakes and pipe the filling into these holes. Frost the cupcakes (you can either use another piping bag, or just use a knife, which is what I did, obviously). Sprinkle each frosted top with about 1 tsp granulated sugar. Use the handy torch lighter you purchased earlier that day to bruleé the tops of cupcakes. Pat yourself on the back and share with the birthday girl.

Monday, 3 September 2012

Muffling

As some of you may know, I have recently diminished the amount of time spent at my job of two years. The reason? To pursue baking. At a farewell dinner for me and another departing coworker, my boss disclosed that she has a bran muffin for lunch every day. Muffins! A language I speak. With this revelation came newfound motivation for yours truly to win employee of the year status. As much as I adore fattening treats like dough filled cupcakes, I have been known to dabble in the healthier side of baked-things. Bran is one item with which I have not previously experimented. No time like the present! I investigated a few different recipes; the first was Ina Garten's banana bran muffins. These sounded slightly more enticing than a plain, bland, raisin-filled muffin. However, as with many of Ina's recipes, the long list of ingredients was intimidating. I perused an allrecipes.com recipe which appeared far more manageable. I ultimately used the allrecipes guidance, with some inspiration from Ina.

Banana-Pecan Bran Muffins
Adapted from http://allrecipes.com/recipe/classic-bran-muffins/

- 1 1/2 cups wheat bran
- 1 cup buttermilk
- 1/3 cup vegetable oil
- 1 egg
- 2/3 cup brown sugar
- 1/2 tsp vanilla extract
- 1 cup flour
- 1 tsp baking soda
- 1 tsp baking powder
- 1/2 tsp salt
- 1 banana, cut into chunks
- 1/2 cup or so pecans, roughly chopped (I happened to have some pecans lying around. Despite my usual no-nuts policy in otherwise nut-free baked goods, in this case it seemed appropriate)

Preheat oven to 350 degrees F. Grease a muffin tin - in the absence of spray grease, I find vegetable oil to be an effective anti-stick agent for muffins.

Whisk the wheat bran and buttermilk in a bowl. Let sit for 10 minutes.
Mix the oil, egg, brown sugar and vanilla in a separate bowl (liquid cup measure should do the trick). Add this to the buttermilk mixture and combine. Add the flour, b.s., b.p, and salt and mix until just combined. Lastly, add the nuts and banana.
 Fill each muffin holder in the pan about 2/3 full. Bake for 15-20 minutes. Feed to your roommates and co-workers.

Saturday, 25 August 2012

The cookies are IN the cupcakes?!?!

Sometimes, one's baking plans are foiled. The other day, I had planned to make whoopie pies - a task which had previously intimidated me. With the help of my beloved stand mixer, the cookie-pies were no longer daunting. Unfortunately, a turn of events involving the Evil Cold Virus transpired, barring me from the parental home and lodgings of Kitchie. I considered proceeding with the whoopie pies sans electronics, but assessed that they would be less than superior. I remembered that I had a box of yellow cake mix, and figured I might as well put it to good use. A google search of "yellow box cake mix" yielded a number of grotesque-sounding trashy-centric dishes. I decided to go with the trashiest:

Chocolate Cookie Dough + Cupcakes
from allrecipes.com (the app)

Cookie dough balls
- 1 1/2 cups flour
- 1/4 tsp baking soda
- 1/4 tsp salt
- 1/2 cup softened butter
- 1/4 cup white sugar
- 1/2 cup brown sugar
- 1 egg
- 2 tsp vanilla extract (yes, this is what the recipe called for - magic!)
- chocolate chips - 1 cup ish

Cake surroundings
- 1 box yellow cake mix
- 1 1/3 cup water
- 1/3 cup canola oil
- 3 eggs

Frosting
Purchase your choice of canned, pre-made frosting (or, in my case, the only frosting within a mile radius of your home).

First, make the cookie balls. Cream butter and sugar. Add the egg and vanilla. Beat until well combined. Add the flour, b.s. and salt. Mix in the choc chips. Shape the dough into balls and place on a cookie sheet. Freeze for about 1-2 hours - this helps the dough balls maintain their dough ball shape. Make 24 balls total.

Preheat oven to 350 degrees F. Fill a cupcake tin with cupcake liners.

Mix all the cake ingredients until just combined. Scoop the batter into the cupcake liners until about 2/3 full. Place a frozen cookie dough ball on top of each cupcake. Note: the recipe said you would have 24 cupcakes - I only ended up with 21, but that just meant bigger cakes and extra cookie dough.
 
Bake the cupcakes for about 20 minutes - the dough will still be raw.  Let the cupcakes cool. Note: I first tried them unfrosted and, unsurprisingly, found them tasty but sub-par. When I finally tracked down some Betty Crocker dark chocolate frosting, the cupcakes were elevated to a level of uber-sweet toxicity. The good kind.

Tuesday, 14 August 2012

Instagram

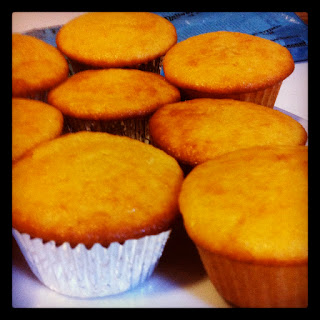
A few weeks ago, finally, a friend of mine had a birthday. While baking is always a delight for me, there is nothing so overwhelmingly rewarding as baking for someone's birthday. Birthbaking. When Luz decided to join the ranks of the 24 year olds, it was clear that she needed to be compensated with a treat. After a Saturday spent baking ourselves in the sun at Precita Park, Sophie and I decided to lay low at the temporarily vacated parental house (what can I say, they are housing my precious kitchenaid). After a few episodes of Chopped, we were ready for business - with business being cupcakes. We perused recipes using coconut, chocolate and such, finally deciding that we surely couldn't go wrong with red velvet cupcakes. [insert quote about the best laid plans]. We came up with a list of ingredients we needed and headed to the (one and only no really) local grocery store, Whole Satan. We gathered the cream cheese, the powdered sugar and the cocoa powder, but struggled to locate the crucial red food coloring (two tablespoons required for true redness). We finally asked an employee who kindly led us back to the baking aisle we had already scoured. Tucked in a tiny corner was a mini pack of food colorings in a variety of colors. We thanked the employee kindly and took a closer look. Our jaws dropped. These four bite-sized bottles, containing barely one tablespoon each of coloring, cost $18.99. "We could try beet juice. Or pomegranate?" Suggested Sophie. I checked the iPhone for other food dye substitutions with little success. Beet juice takes too long; pomegranate is too flavorful; what the hell is cochineal? "Let's see if the corner store has it." We purchased our other items (the grand total of which was less than that of the food coloring alone) and proceeded to the corner store. They didn't have it.

We made them anyway:

Not-Red Velvet Cupcakes
adapted from http://www.foodnetwork.com/recipes/paula-deen/red-velvet-cupcakes-with-cream-cheese-frosting-recipe/index.html

Cupcake Part
- 2 1/2 cups flour
- 1 1/2 cups sugar
- 1 tsp baking soda
- 1 tsp salt
- 3 tsp cocoa powder (original recipe called for 1, but we needed a color boost. Also, it is chocolate)
- 1 1/2 cups vegetable oil (depite popular opinion, as Sophie can attest, oil is often superior to butter in cakes for the moistness it lends)
- 1 cup buttermilk (or milk mixed with a tablespoon white vinegar or lemon juice)
- 2 large eggs
- 1 tsp white vinegar
- 1 tsp vanilla

Frosting Part
- 1 lb cream cheese (room temp)
- 2 sticks butter (I think we used salted and it turned out just fine - room temp)
- 1 tsp vanilla, or to taste
- 3 cups powdered sugar, or to taste (original called for 4 cups, but cream cheese frosting recipes almost without fail are too sweet. It is best to add some, then see if you want it a little sweeter or not)

Preheat oven to 350 degrees F. Grease some muffin tins (line with cupcake papers if you have them).

Have your lovely helper mix the drug ingredients (up through cocoa powder) in a small bowl.

In the bowl of your kitchenaid, mix the oil, buttermilk, eggs. Add the vinegar and vanilla and beat it all together. Slowly pour in the dry mixture with mixer on low (to avoid flour-face) and mix until just combined. Don't overmix! Scoop the batter into the prepared muffin tin. We filled the cups more or less to the top and no one was complaining. Bake for about 20-25 minutes. Remove and cool on a rack. This batch made about 18 cupcakes, but could be stretched if the cupcakes are not monstrously large.

For the frosting: Clean the kitchenaid. Whip the butter and cream cheese together thoroughly. Very thoroughly. Add the vanilla and some powdered sugar. Taste the concoction. Determine whether it needs more sugar or vanilla. Proceed accordingly.

Once the cupcakes are cooled, use a butter knife to spread ample amounts of frosting on top of each (rest assured, you will have leftover frosting). If you have sprinkles, put some on top. Feed them to the birthday girl.

Wednesday, 25 July 2012

Sticky

Every now and then, I stun myself with my talents. Even less frequently, I stun those around me. One such instance was not too long ago, when Justin decided to cook dinner for some of his and my friends while I was housesitting for my parents. I generously agreed to prepare dessert. I had bought some dates on a recent food buying spree, primarily on impulse (and since dates are delicious), but also with a hidden agenda. As every good South African knows, the best dessert to come out of the third world contains dates. Cape Brandy Pudding is truly a delight - albeit less of a rare treat now that one can purchase it in frozen form from one's local Whole Foods (note: this is not a plug for Whole Foods). But I digress. I ended up rounding off the culinarily thrilling evening with a delicious Toffee Cake. I spontaneously replicated this cake recently for my parental units, being that they are huge proponents of anything with the words "toffee" and "dentist" in the title. I really followed the recipe too:

Toffee Cake
From the Big Book of Baking

- 1 cup chopped dates (as luck would have it, my weird parents happened to have some dates lying around!)
- 3/4 cup boiling water
- 1/2 tsp baking soda
- 6 tbsp unsalted butter (it's a cake, use unsalted)
- 3/4 cup granulated sugar
- 1 large egg
- 1/2 tsp vanilla (I even measured the vanilla this time!)
- 1 1/2 cups self-rising flour (do they even sell that in this country? Oy vey. Good thing I have an iPhone now!)

Toffee Sauce Part
- 1/3 cup brown sugar
- 3 tbsp butter (also unsalted)
- 2 tbsp milk (can use cream)

Preheat oven to 350 degrees F. Grease an 8x8 or so cake pan. Maybe 9x9.

Mix the dates, water and b.s. in a small saucepan. Heat gently for a few minutes without boiling (it will erupt) until dates are soft and separate from each other. Remove from heat. Use your Kitchenaid to cream the butter and sugar. Add the egg and vanilla and beat well. Pour in the date mixture and continue mixing with mixer. Gently beat in the flour just until combined. You will probably have to do a few mixes by hand with a spatula for full mixation (this is one flaw of the almost flawless kitchenaid. Such is life).

Pour the batter into greased pan. Instagram a photo of your kitchenaid (optional).

Bake  for about 30-40 minutes until toothpick comes out clean.

While the cake is baking, work on the topping. Place the butter, brown sugar and milk/cream in a small saucepan. Heat until the sugar has dissolved and the mixture resembles a toffee glaze (about 5 minutes).

Once the cake comes out of the oven, poke holes all over the top. I recommend using a toothpick rather than a fork as fork holes tend to be very obvious and not so lovely looking, while toothpick holes are less visible. Pour the toffee mixture over the top of the cake. Let it cool somewhat, then unleash your family/friends upon it.

Tuesday, 17 July 2012

Dressing

Every once in a while, friends prove themselves to be more spectacular than the average human. My pseudo sister Cady is one such person. She not only has guided me through the nonsensical world of pre-medicine with grace and generosity, but she also is the person who taught my sheltered 9 year old self what "kicking it" means. Most recently, she brightened my week with a simple statement: she had a dresser for me. To fill in those who may not be familiar with my bedroom situation up until present, I moved in to my current home in november and have since been using a combination of a chair, a closet and a suitcase for housing my clothes (no comments, parents). Anyway, when Cady shared this news with me I was immensely grateful. She additionally offered her husband and his truck to transport aforementioned dresser to my humble lodgings. I almost cried. Instead of shedding tears, I embraced this moment as an opportunity to explore the world of gluten free baking. As it happens, Cady does not tolerate gluten well (or at all). Still, she and Joseph were bringing me a dresser and clearly needed to be compensated with cookies. And so I did this:

Gluten-less peanut butter cookies 
Adapted from the Internet

- 1 cup peanut butter (I used chunky but I doubt it matters)
- 1 cup sugar
- 1 egg
- 1/2 tsp baking powder

Preheat oven to 350 degrees F.

The recipes I looked at advised against using a stand mixer, so I left the kitchenaid out this time and went the old fashioned route. Mix the sugar and peanut butter until smooth. Add the egg and baking powder. Mix until one cohesive dough. Shape the dough into little balls. Place balls on a baking sheet. Flatten slightly (I used my fingers but you can use a fork if you're fancy). Sprinkle the dough balls with more sugar (the other name for these cookies is "Sugar and Peanut Butter Cookies"). Bake for about 10 minutes (mine went a little longer because I started playing bubble mania and temporarily exited the real world. It turned out ok).
Cool the cookies on a rack. Hide them from your hungry boyfriend. Gift them to your lovely and amazing friend-sister. Don't wait a week to put your clothes in your new dresser.

Tuesday, 10 July 2012

Upside Down


Some of you may recall my previous adventure with upside down cake. For those who do not, let's just say it was an adventure of the smoky, burning variety. Following my recent acquisition of my very own artisan (that's the fanciest one) kitchenaid standing mixer, I found myself inspired to redeem myself before the upside down cake gods. Kitchie is subletting a corner in my parents' kitchen, obliging me to concoct this cake in their residence. Lucky for me, they had a ripe mango just waiting to be experimented upon. I have made and tasted a variety of different upside down cakes, including pineapple, plum and apricot, and, I thought to myself, why should mango be any different? I requested permission from my father to use this mango in my endeavor.
"A mango upside down cake?" He asked dubiously. "You just made that up, didn't you."
"No!" I lied, unconvincingly.
He sighed. "Very well. Knock yourself out." I complied.
Based on some ongoing criticisms of my failure to follow exact recipes (and my lack of pineapple upside down cake recipe ingredients), I looked up a mango specific upside down cake recipe. This is not to say that I followed it to a tee (I did not), but I tried! Here's what happened:

Mango Upside Down Cake
adapted from Epicurious.com

Ingredients:
Top part:
- 1 mango (or two if you have a generous father)
- 1/2 stick butter, unsalted
- 1/2 cup sugar (preferably brown, but if your mother only stocks white sugar that will suffice in a pinch)

Cake part:
- 1 1/2 cups flour
- 1 tsp baking powder
- 1/4 tsp salt
- 1 stick butter, softened and unsalted
- 1 cup sugar (white)
- 3 eggs
- 1 tsp vanilla
- 1/2 cup orange juice (recipe called for mango nectar... if I knew that this was and how to procure it and were not lazy, I certainly would have used this, probably for a more delicious outcome. Orange juice, however, did the trick)

Preheat oven to 350 degrees F.

Make top part of the cake. Peel the mango and slice pieces off. Try not to eat it all. Melt the butter and sugar together in a small saucepan for about 1-2 minutes, or a little more if your sugar doesn't want to incorporate nicely. Pour the mixture into a greased round cake pan (9x2 inches, or something like it). Arrange mango slices on top of the mixture.


In a liquid cup measure or a small bowl, mix together the flour, b.p. and salt. Prepare your kitchenaid (if you have one. If not, I'm so sorry for you). Cream together the softened butter and sugar until very fluffy. Add one egg whole, and add the yolks of the other two. Reserve the whites in another bowl. Add the vanilla and beat until all combined. Next, use your fancy spill-prevention attachment to add half the flour mixture. Continue beating on low speed (don't overbeat your cake!). Pour in the orange or whatever juice and mix, then add the rest of the flour. Beat until all is just combined.
In the separate bowl, whisk the eggs whites until they reach stiff peaks. Once they are stiff, fold the whites into the cake batter. Be gentle. Pour the fluffy, pale batter over the mago slices and topping. Place cake in the oven and bake for about 1 hour. Lovingly wipe all the flour and batter of your kitchenaid.
Once the cake is done, serve it to your parents so they will support you going to baking school. Then have them go out of town so you can invite your friends over and feed them the cake so they will keep being your friends. One love.

Sunday, 19 February 2012

Apples and oranges

This week San Francisco has the joy of hosting the lovely Julie! When people are in town, I find it is nice to bake for them. Some may argue that I will use any excuse to bake. This is true, but some reasons are more inspiring than others, and the arrival of the Best Roommate Ever certainly warrants a special baked good. By definition, "special" means anything that isn't a chocolate chip cookie. "Best Roommate Ever special" means cake. I had the luxury of being at the parental home when this baking moment struck, allowing the cake to be elevated to a new level of rarity: cake with fruit.

"Cake with fruit" is not to be confused with the highly contentious "fruitcake." (I was able to concoct a fruitcake-like dessert last week that was far from horrific, but generally speaking the name does not evoke a celebratory palate in my mind.) Cake with fruit is a similarly challenging concept. It is, generally speaking, my philosophy that fruit has no place in dessert (I know, I know. Healthy blah blah). Every now and then, however, a certain fruit/sugar + flour proportion makes for a sufficiently enticing baked good. In this instance, access to an abundance of oranges led me to a recipe entitled "Easy Orange Cake." If there is one word I love more than the word "cake," it is, you guessed it, "easy." I adjusted the recipe slightly just because. Haters can cry in the corner.

Best Roommate Orange Cake
adapted from "Moroccan Orange Cake"

* 4 eggs
* 1 1/2 cups sugar
* 1/4 cup olive oil
* 1/4 cup vegetable oil
* 2 cups flour
* 4 tsp baking powder
* 1/2 tsp salt
* 1/2 cup orange juice
* zest of 1 orange
* 1 tsp vanilla
* 1 tbsp sour cream

Preheat oven to 350˚. Grease a cake pan (the Moroccan version called for a tube pan. I don't have a tube pan so I used the often hazardous spring-form pan. This time I remembered to put it on a baking sheet in the oven and thereby did not fill the house with smoke). Zest orange and squeeze as much juice as possible from orange (I did this by hand as my parents had hidden the juice squeezing device. I don't recommend doing this by hand, especially if your hands are small and weak like mine). Supplement with orange juice from fridge or another orange if necessary to fill 1/2 cup.

Beat the eggs and sugar together until thick. This can be done by hand with a whisk or with your fancy kitchenaid that I will one day possess... Pour in the oils. Note: The choice to use part olive oil, as opposed to all vegetable oil, came from seeing olive oil used in a number of orange cakes. I have learned through recent experimentation that olive oil subtly complements a variety of cake flavors (soon to come: olive oil chocolate cake-loaf). Orange's ability to jump between swimming sweetly in a smoothie (maybe I should be a kindergarten teacher?) and tartly enhancing a salad led me to assume that this, too, was one such versatile flavor. That said, feel free to use all vegetable oil or all olive oil at this stage.

Mix in the flour, baking powder (next time I might try cutting back on one tsp of the baking powder for a slightly denser cake. But I like dense things. And people), and salt. Pour in the OJ, zest and vanilla. The sour cream was another matter of luck/convenience. I have never found sour cream to detract from the deliciousness of a cake. When I saw some in the fridge, undoubtedly on its way to expiring without being used to its full potential, the choice was clear. I was still somewhat tentative and stuck with one tablespoon for trial purposes. Perhaps more next time.

Beat it all up until combined. Pour into prepared springform or tube pan. Bake for 40 minutes. Cool. Cut cake in half. Wrap half in tin foil. Bring half cake to Julie's for post dinner consumption. Sorry for no pictures.